03 3 oauthsupabase설정
1-Supabase_project_생성
2-nextJs
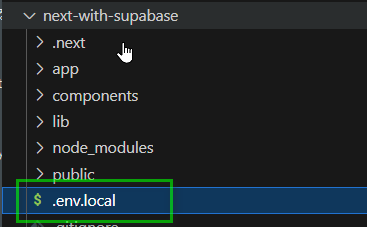
- .env.local 파일 생성
- Next.js에서 서버측 인증설정 - 아래 링크에서 단계별 안내를 따라한다
- 🔗https://supabase.com/docs/guides/auth/server-side/nextjs
- 🔗https://supabase.com/docs/guides/auth/social-login/auth-github
- 수파베이스 패키지 설치
1npm install @supabase/supabase-js @supabase/ssr- 환경변수 설정 - .env.local
1NEXT_PUBLIC_SUPABASE_URL=<your_supabase_project_url>2NEXT_PUBLIC_SUPABASE_ANON_KEY=<your_supabase_anon_key>각 변수의 값은 가이드 문서에서 확인할 수 있다.
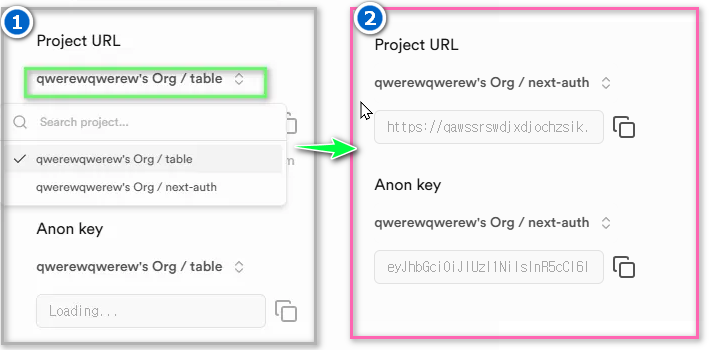
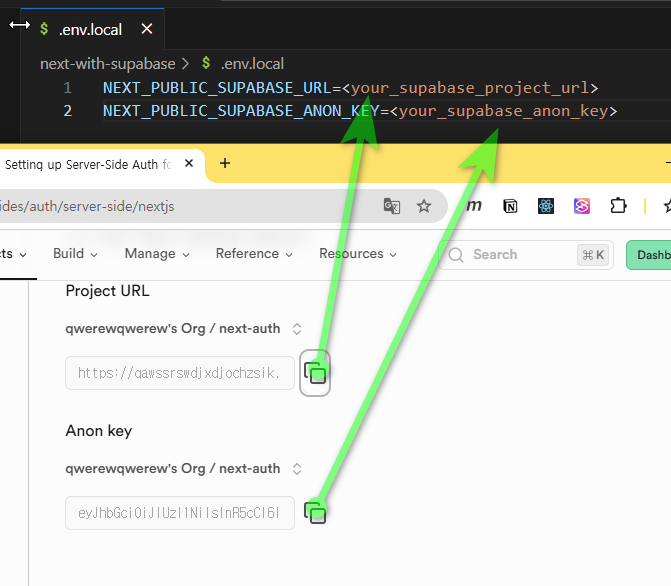
자신의 환경변수에 맞는 값을 확인하여 수정한다
- lib/supabase/server.ts 생성
1import { createServerClient } from '@supabase/ssr'2import { cookies } from 'next/headers'3
4export async function createClient() {5  const cookieStore = await cookies()6
7 return createServerClient(8 process.env.NEXT_PUBLIC_SUPABASE_URL!,9 process.env.NEXT_PUBLIC_SUPABASE_ANON_KEY!,10 {11 cookies: {12 getAll() {13 return cookieStore.getAll()14 },15 setAll(cookiesToSet) {16 try {17 cookiesToSet.forEach(({ name, value, options }) =>18 cookieStore.set(name, value, options)19 )20 } catch {21 // The `setAll` method was called from a Server Component.22 // This can be ignored if you have middleware refreshing23 // user sessions.24 }25 },26 },27 }28 )29}- lib/supabase/client.ts 생성
1import { createBrowserClient } from '@supabase/ssr'2
3export function createClient() {4 return createBrowserClient(5 process.env.NEXT_PUBLIC_SUPABASE_URL!,6 process.env.NEXT_PUBLIC_SUPABASE_ANON_KEY!7 )8}- next-with-supabase\app\auth\callback\route.ts 생성 🔗https://supabase.com/docs/guides/auth/social-login/auth-github?queryGroups=framework&framework=nextjs
1import {NextResponse} from 'next/server';2// The client you created from the Server-Side Auth instructions3import {createClient} from '@/lib/supabase/server';4
5export async function GET(request: Request) {6  const {searchParams, origin} = new URL(request.url);7  const code = searchParams.get('code');8  // if "next" is in param, use it as the redirect URL9  const next = searchParams.get('next') ?? '/';10
11  if (code) {12    const supabase = await createClient();13    const {error} = await supabase.auth.exchangeCodeForSession(code);14    if (!error) {15      const forwardedHost = request.headers.get('x-forwarded-host'); // original origin before load balancer16      const isLocalEnv = process.env.NODE_ENV === 'development';17      if (isLocalEnv) {18        // we can be sure that there is no load balancer in between, so no need to watch for X-Forwarded-Host19        return NextResponse.redirect(`${origin}${next}`);20      } else if (forwardedHost) {21        return NextResponse.redirect(`https://${forwardedHost}${next}`);22      } else {23        return NextResponse.redirect(`${origin}${next}`);24      }25    }26  }27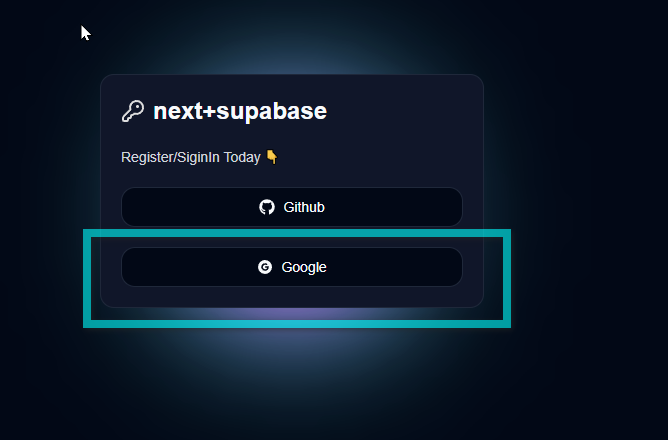
28 // return the user to an error page with instructions29 return NextResponse.redirect(`${origin}/auth/auth-code-error`);30}- next-with-supabase\app\auth\page.tsx 수정
1**'use client';**2import React from 'react';3import {KeyRound} from 'lucide-react';4import {Button} from '@/components/ui/button';5import {FaGithub} from 'react-icons/fa';6import {AiFillGoogleCircle} from 'react-icons/ai';7**import {createClient} from '@/lib/supabase/client';**8
9const Page = () => {10**  const handleLoginWithOAuth = (provider: 'github' | 'google') => {11    const supabase = createClient();12    supabase.auth.signInWithOAuth({13      provider,14      options: {15        redirectTo: `${window.location.origin}/auth/callback`,16      },17    });18  };**19  return (20    <div className="flex items-center justify-center w-full h-screen">21      <div className="w-96 rounded-md border p-5 space-y-5 relative bg-slate-900">22        <div className="flex items-center gap-2">23          <KeyRound color="#dedede" />24          <h1 className="text-2xl font-bold">next+supabase</h1>25        </div>26        <p className="text-sm text-gray-300">Register/SiginIn Today 👇</p>27
28        <div className="flex flex-col gap-5">29          <Button className="w-full" variant="outline" **onClick={() => handleLoginWithOAuth('github')}**>30            <FaGithub />31            Github32          </Button>33          <Button className="w-full" variant="outline"** onClick={() => handleLoginWithOAuth('google')**}>34            <AiFillGoogleCircle />35            Google36          </Button>37        </div>38        <div className="glowBox -z-10"></div>39      </div>40    </div>41  );42};43export default Page;
3-소셜로그인
3-1-깃허브
3-1-1-수파베이스
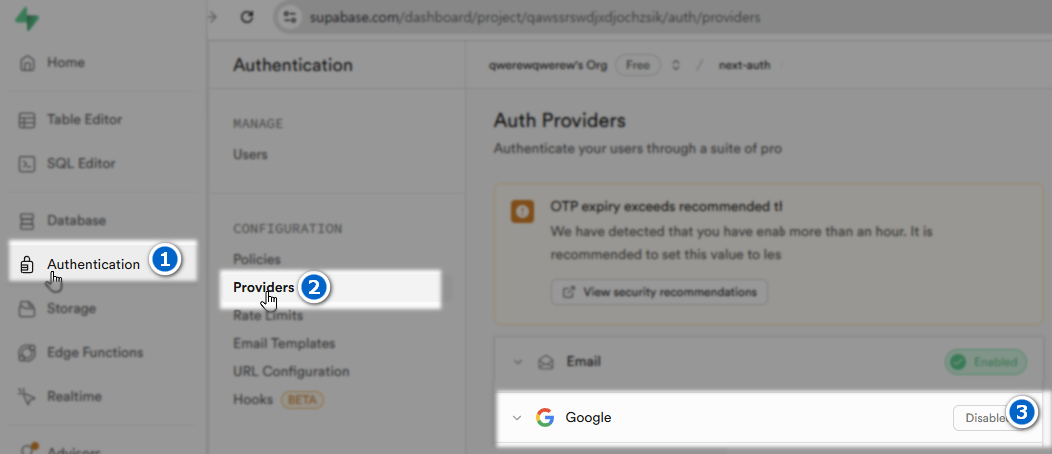
- 대쉬보드의 Authentication 로 이동후 이미지와 같이 선택한다
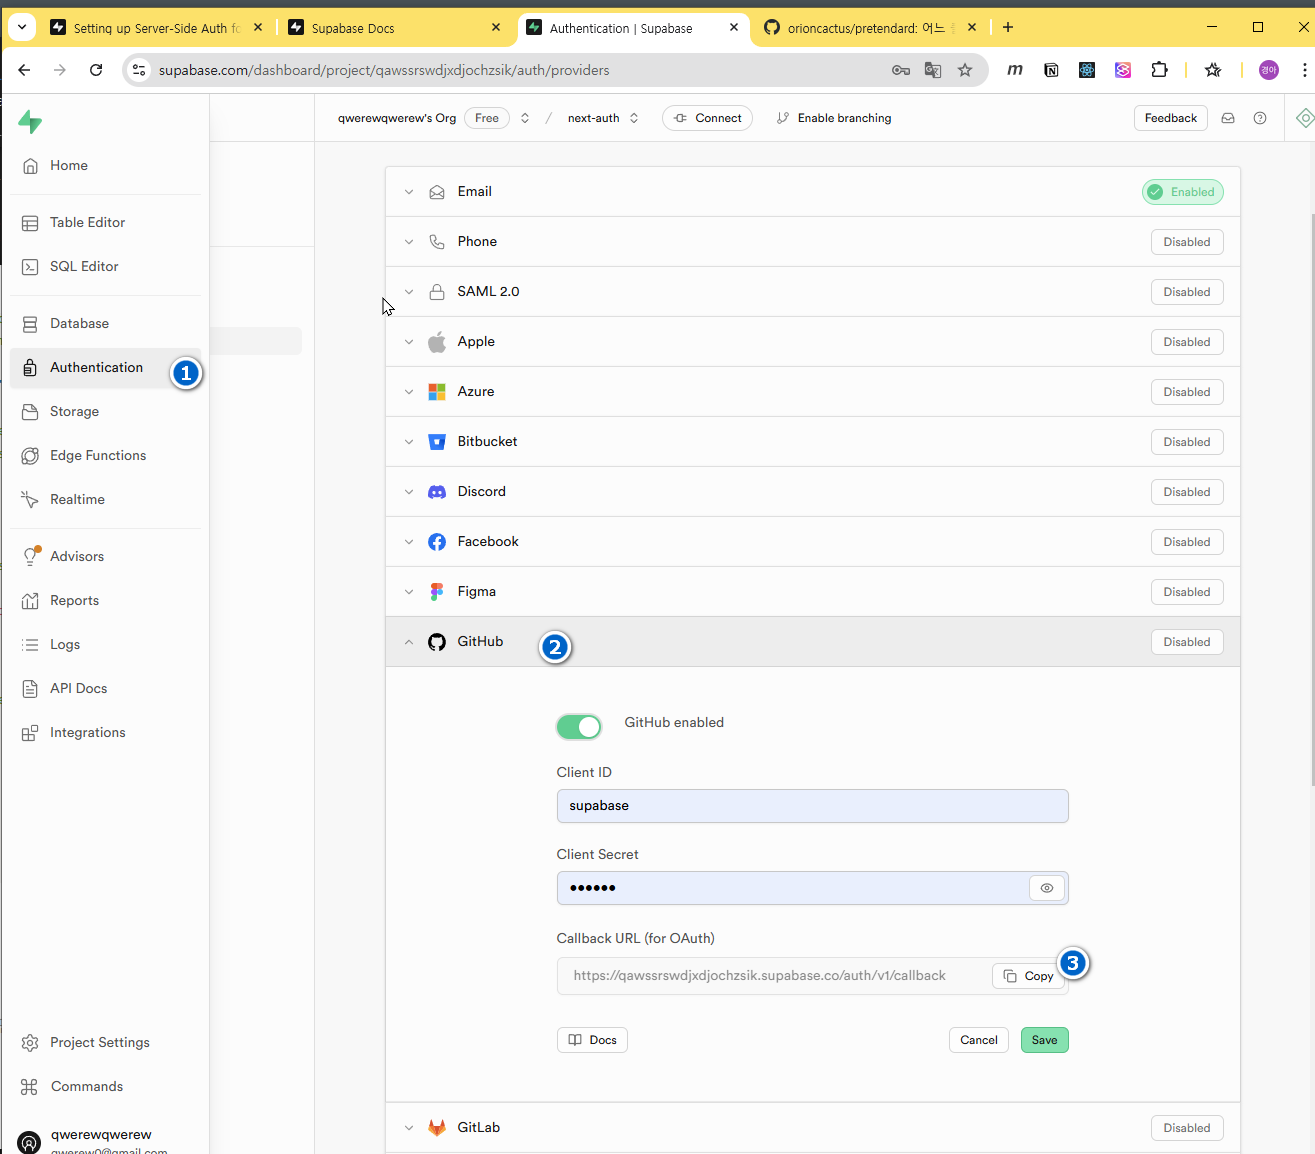
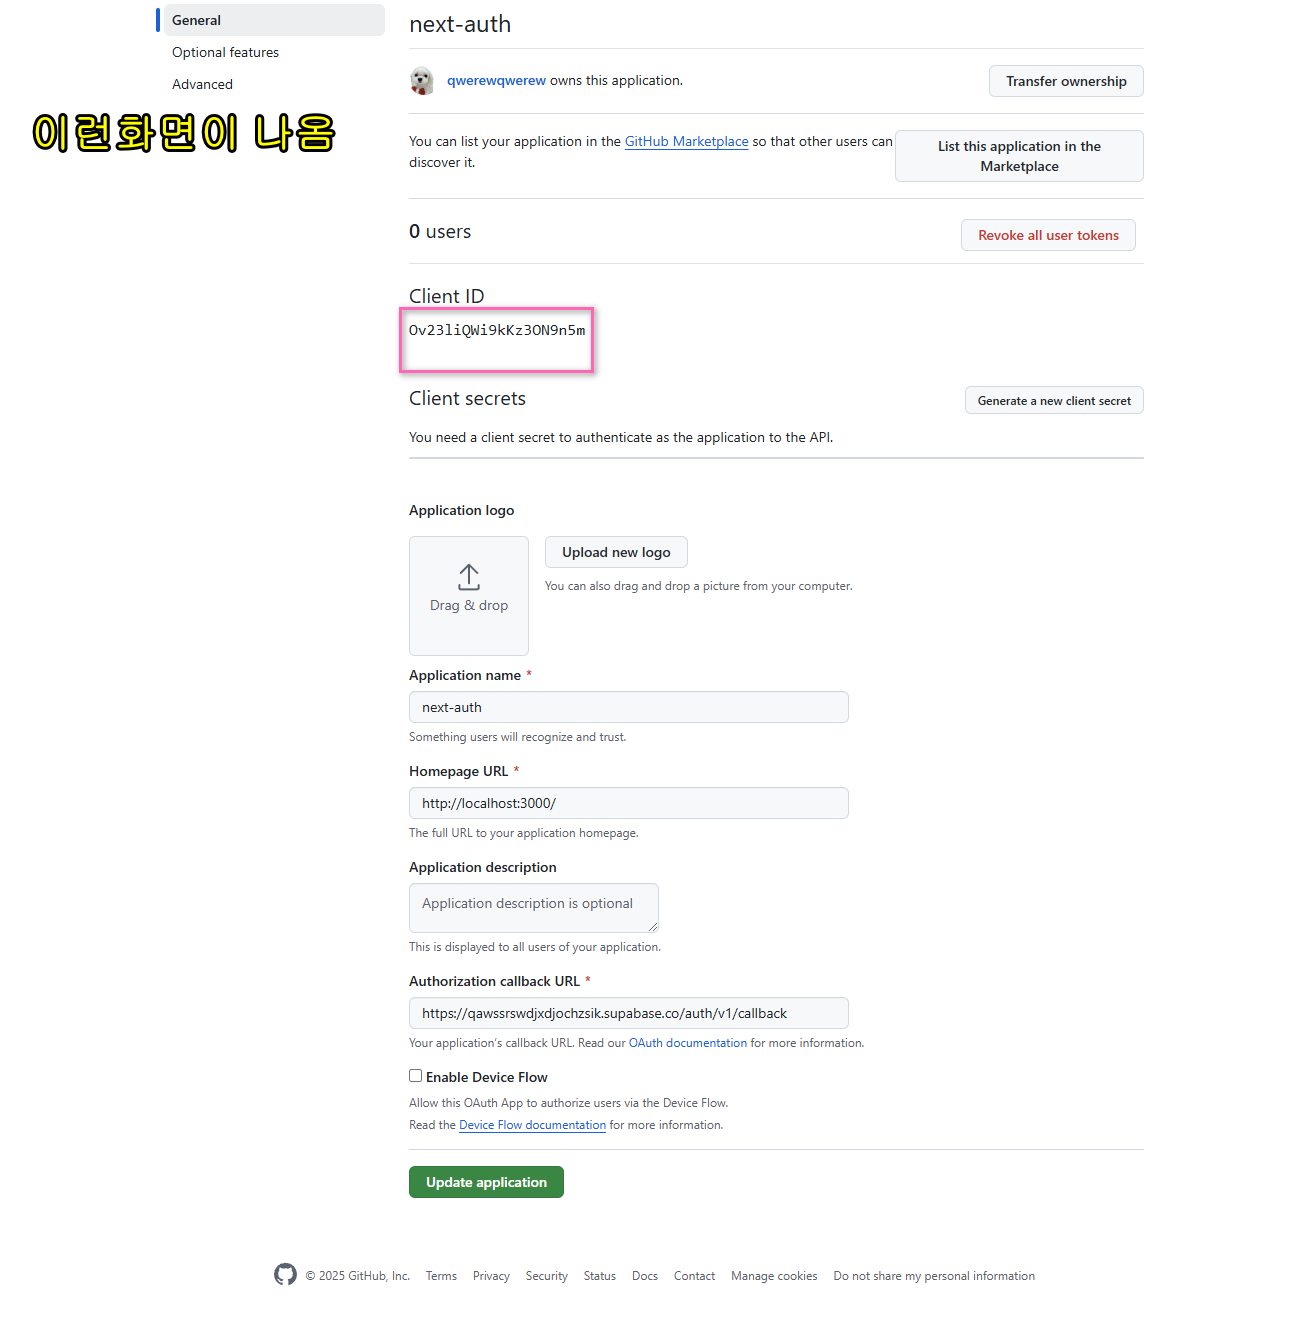
3-1-2-Github
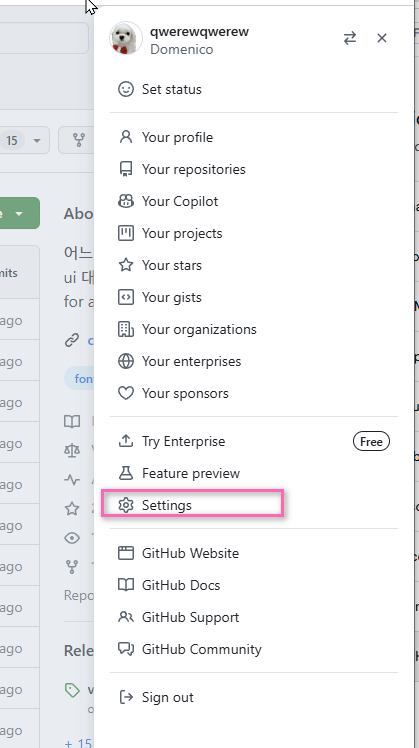
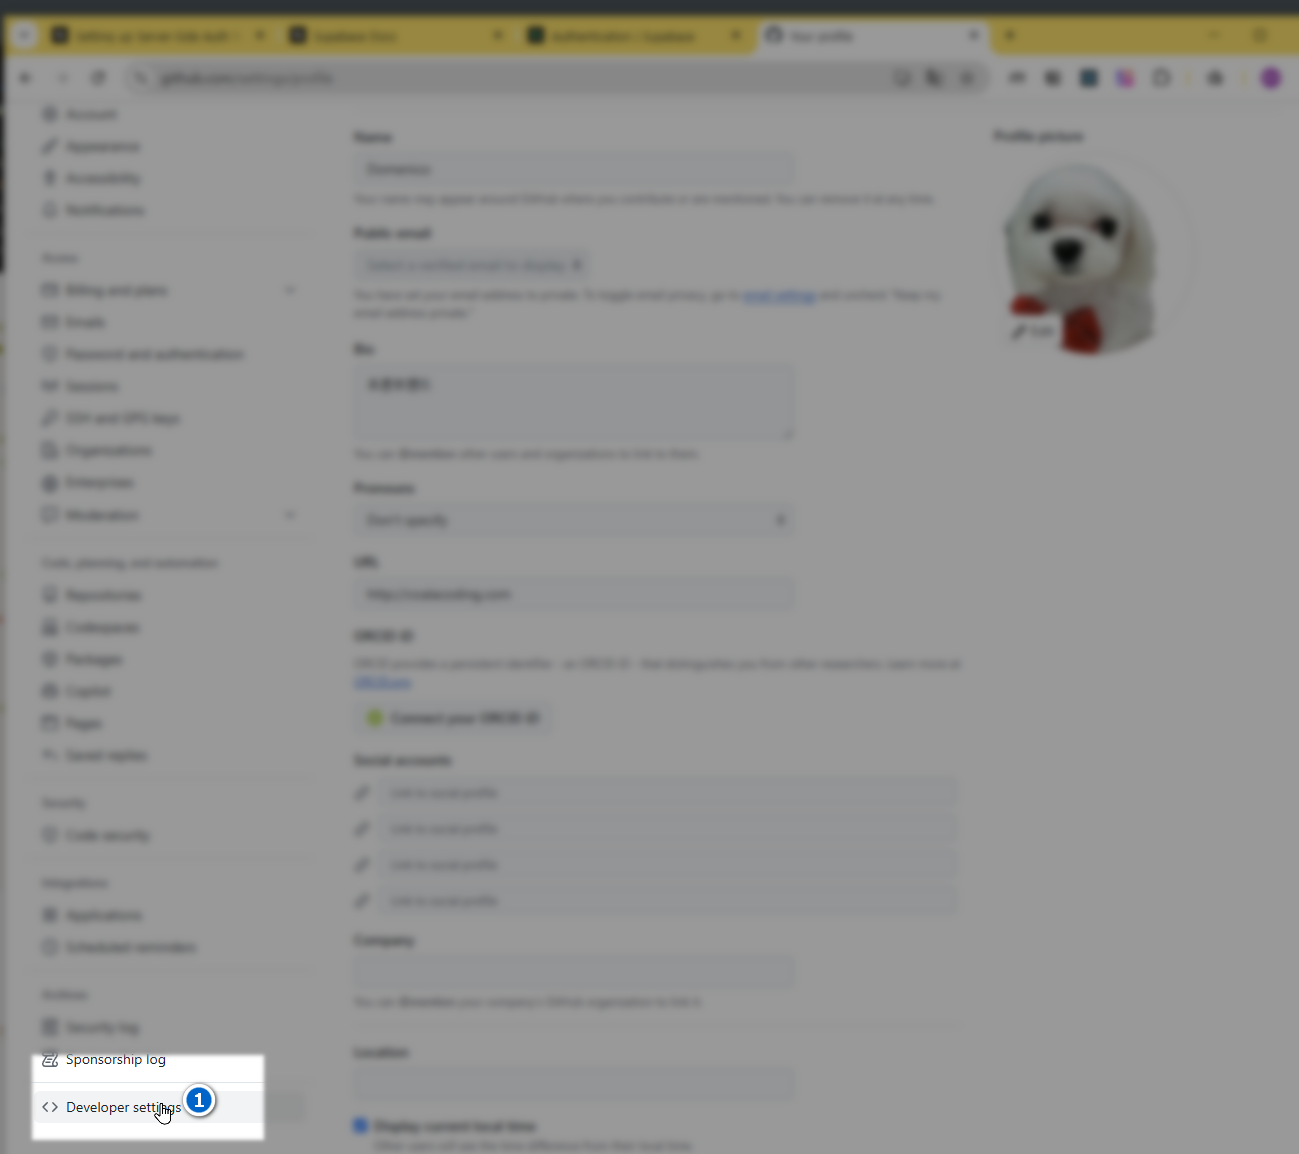
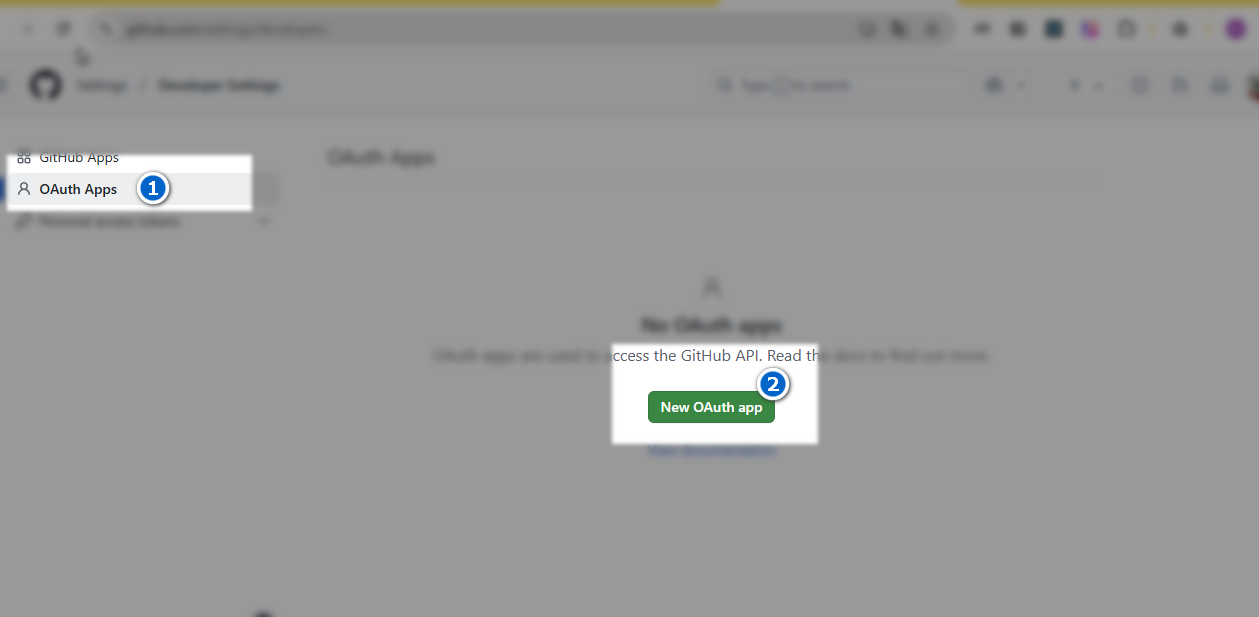
- 본인의 계정으로 로그인 후 프로필설정을 클릭한다
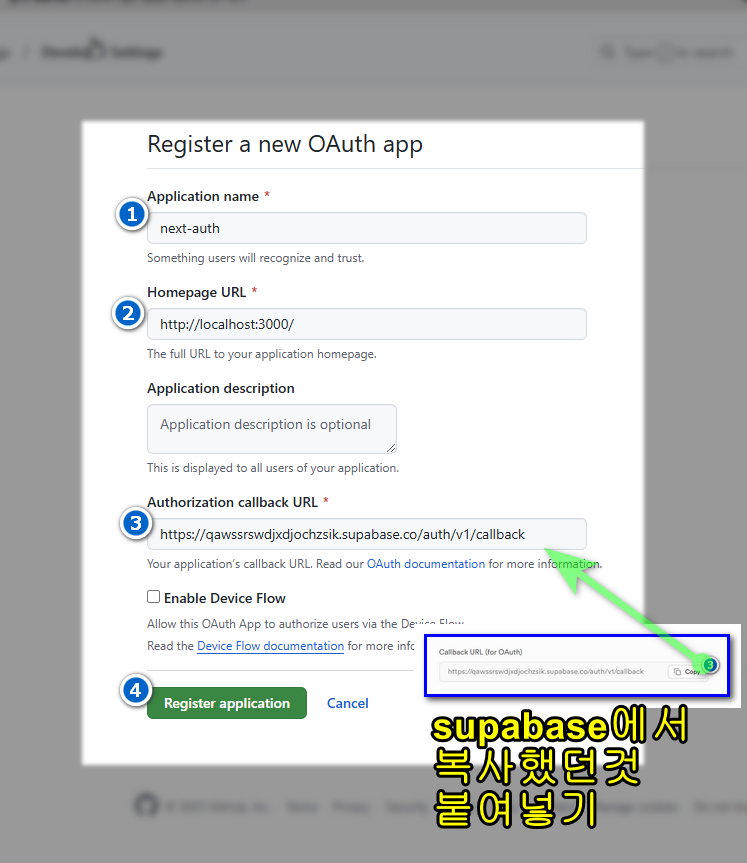
- 등록 완료 후 아이디와 비번을 supabase에 붙여넣기 그림참조
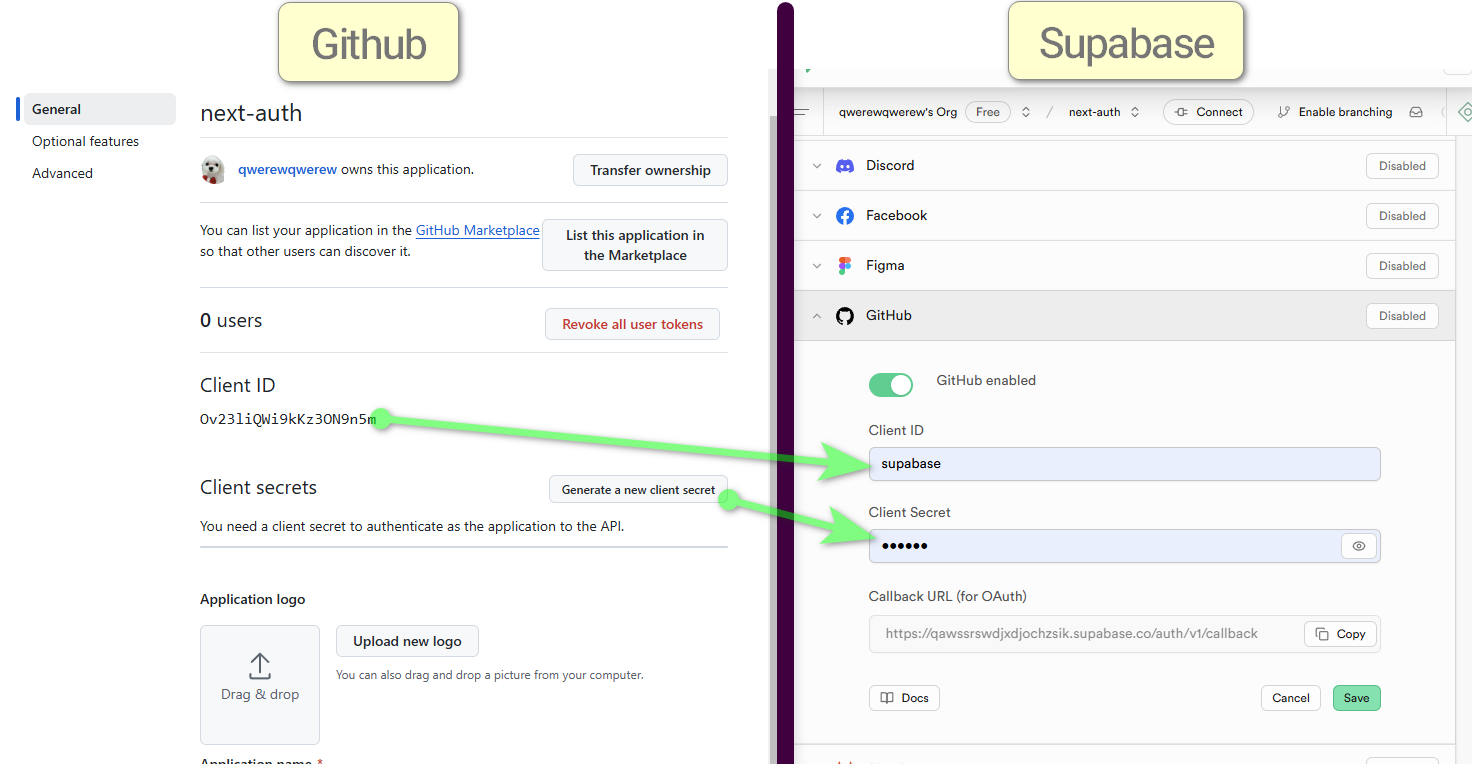
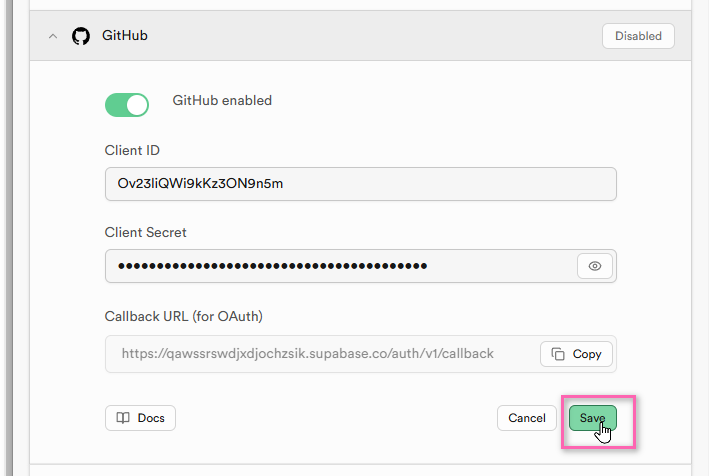
- supabase에 저장
3-1-3-테스트
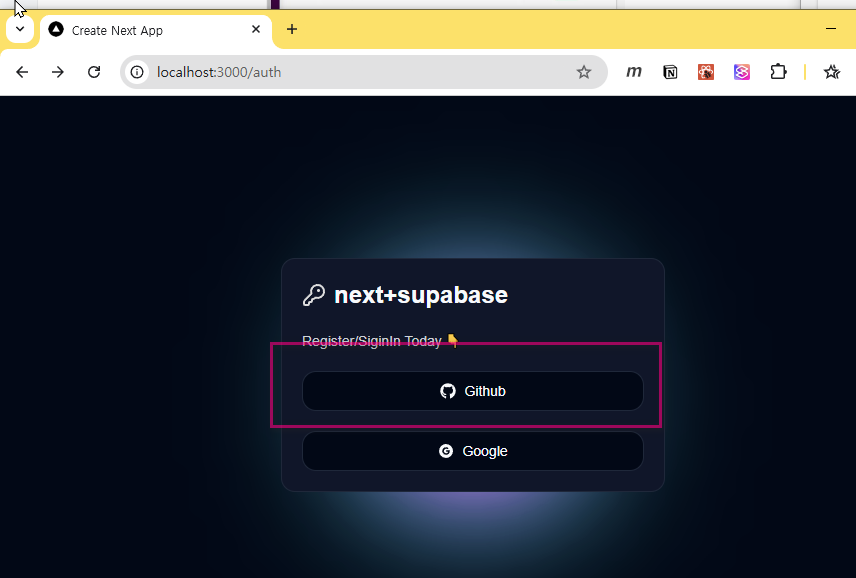
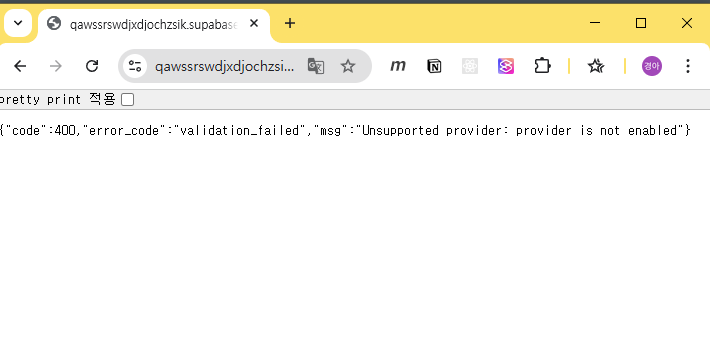
- 사용자 등록전
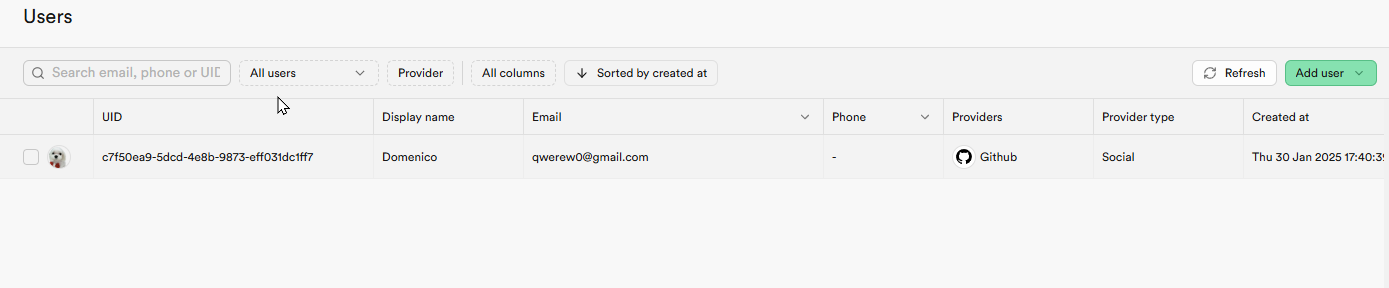
- 사용자 등록 후
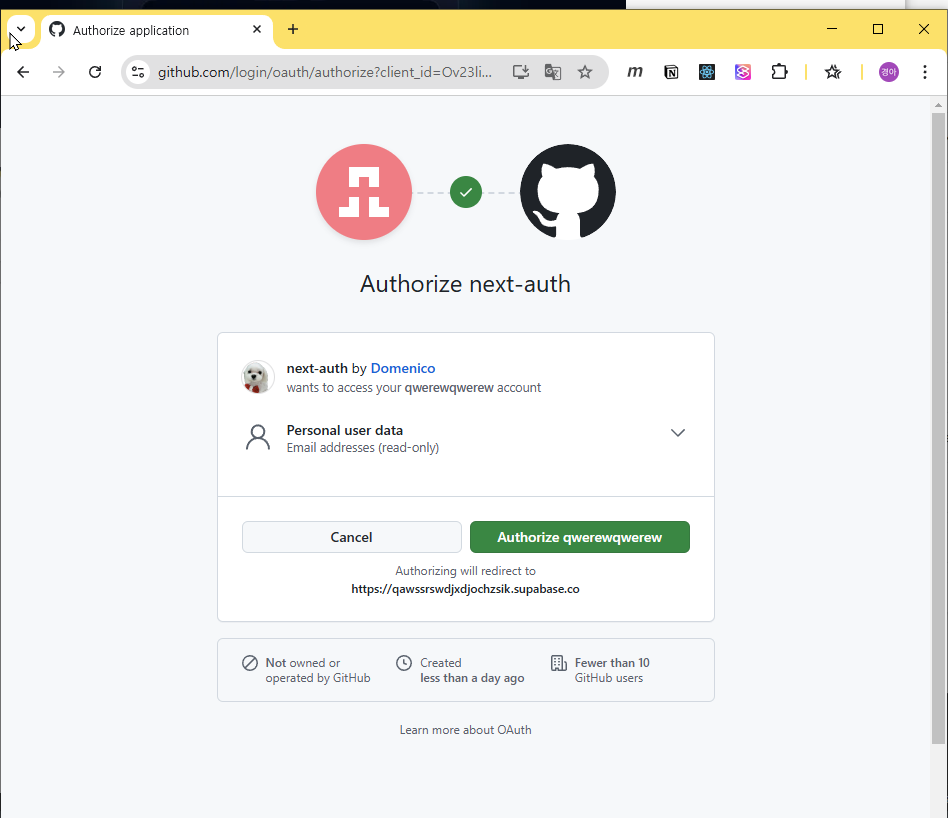
- Authorize 를 클릭하면 홈으로 이동하고 사용자 정보는 데이터베이스에 저장된다
3-2-구글
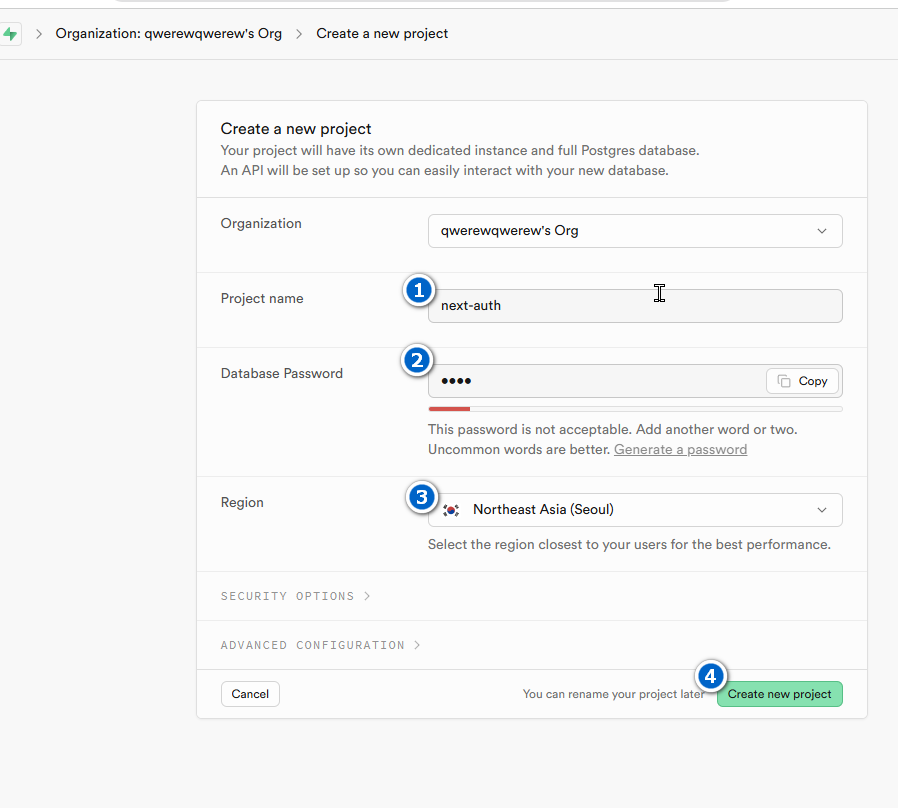
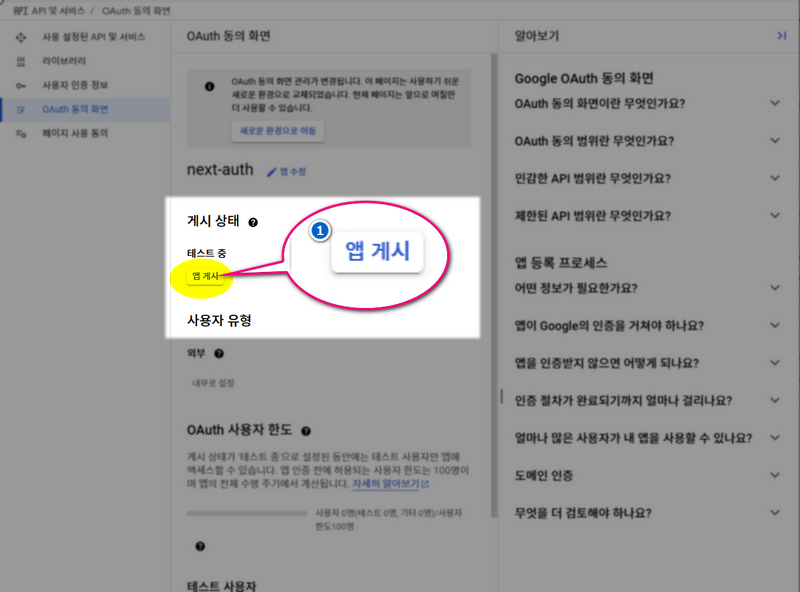
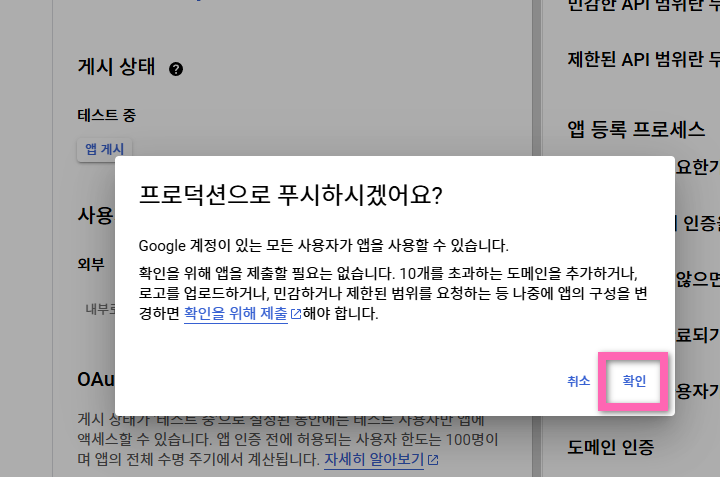
3-2-1-프로젝트 등록
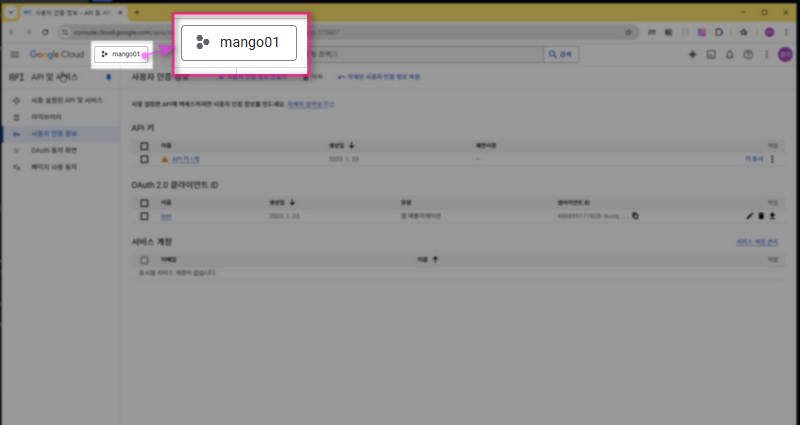
- 수파베이스 가이드의 링크로 이동 https://console.cloud.google.com/apis/credentials?inv=1&invt=AboOFw&project=mango-375607
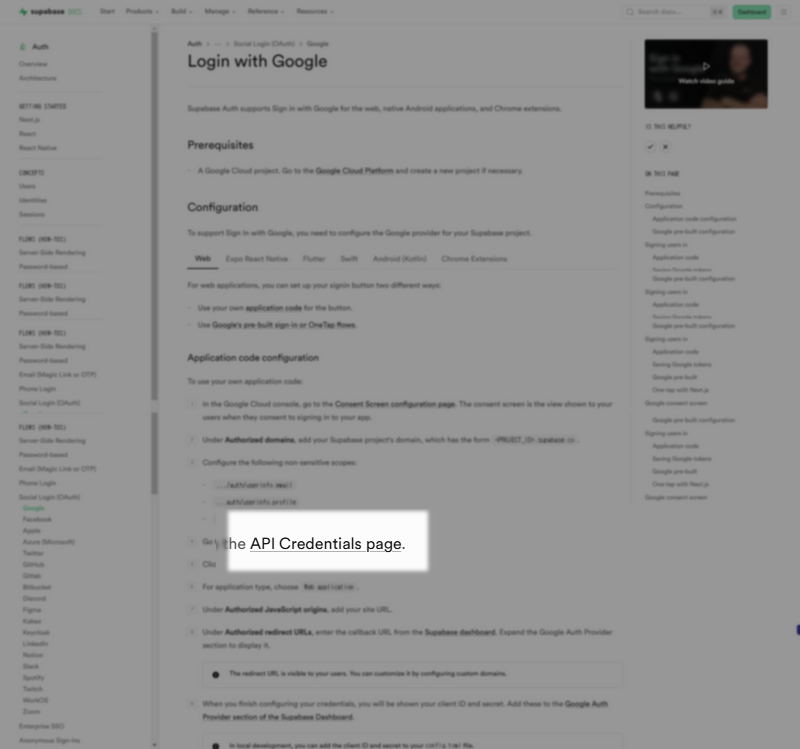
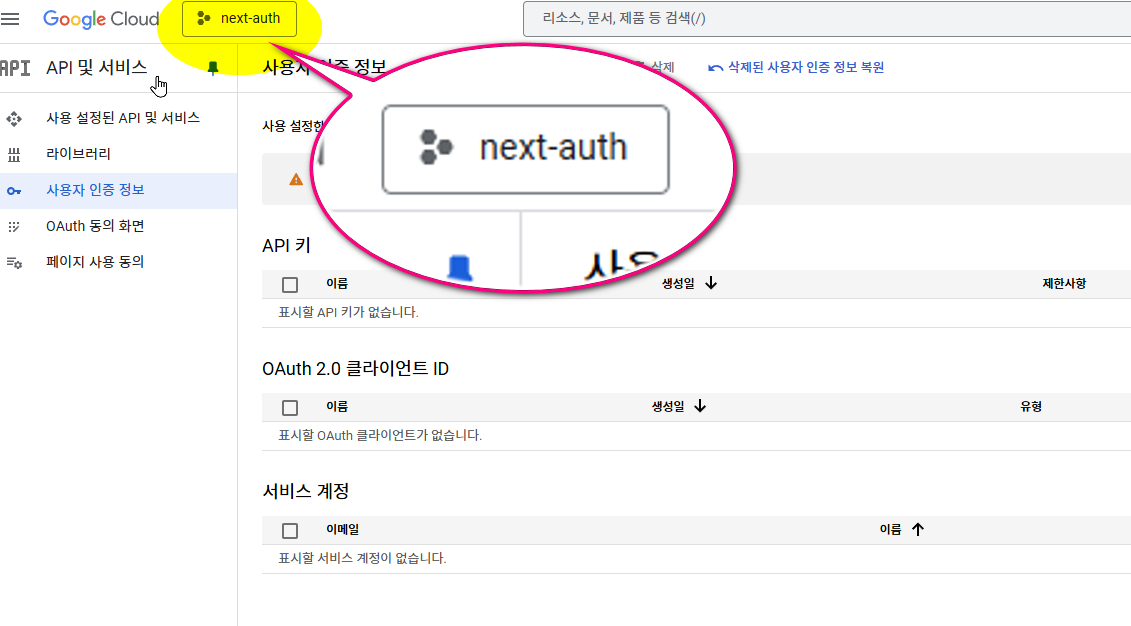
- 이미지의 표시된 부분을 클릭한다
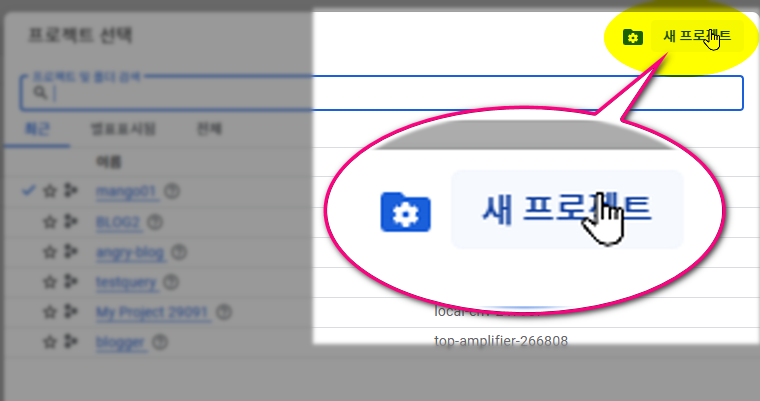
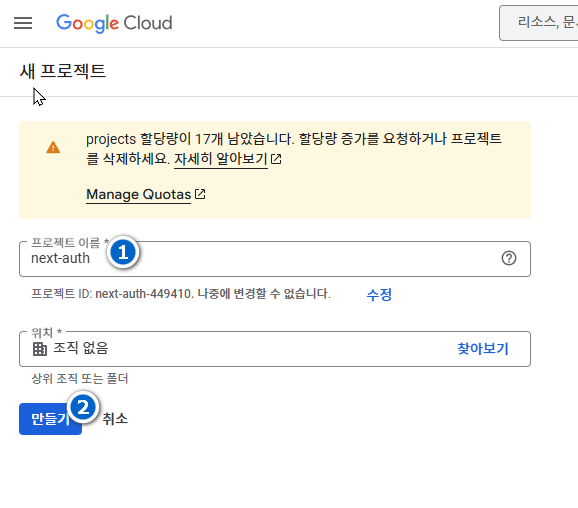
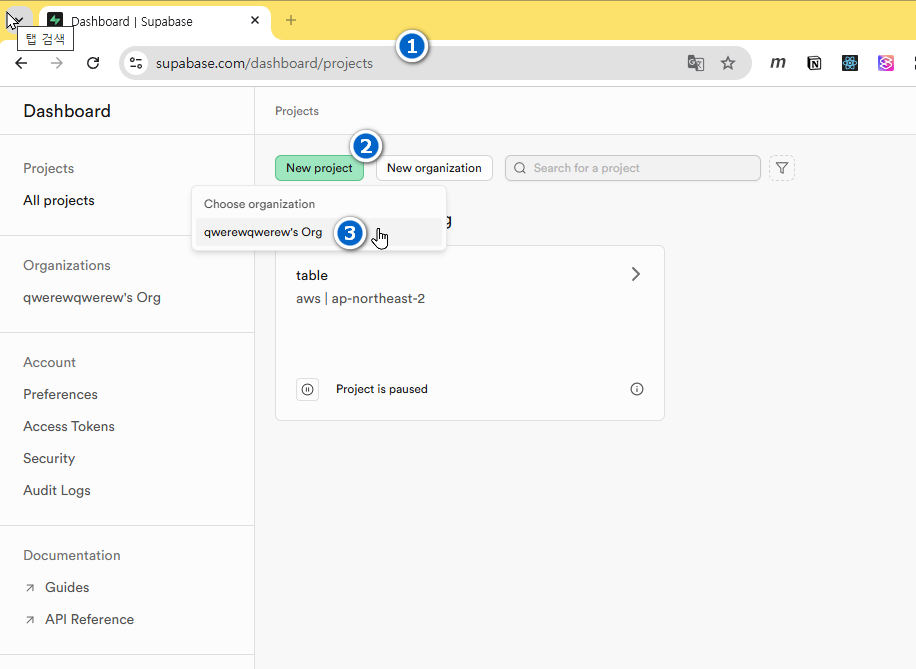
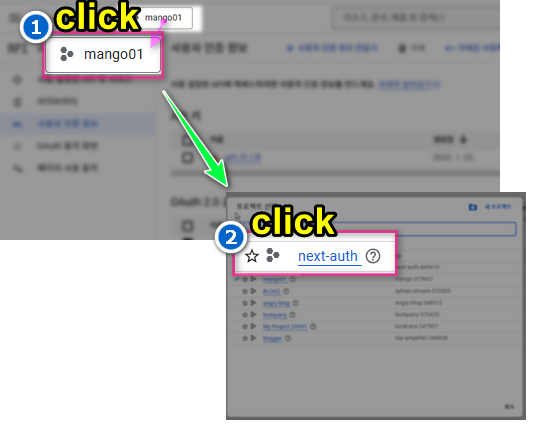
- 대시보드에서 화면 상단의 프로젝트 버튼을 클릭하여 생성한 프로젝트를 선택한다.
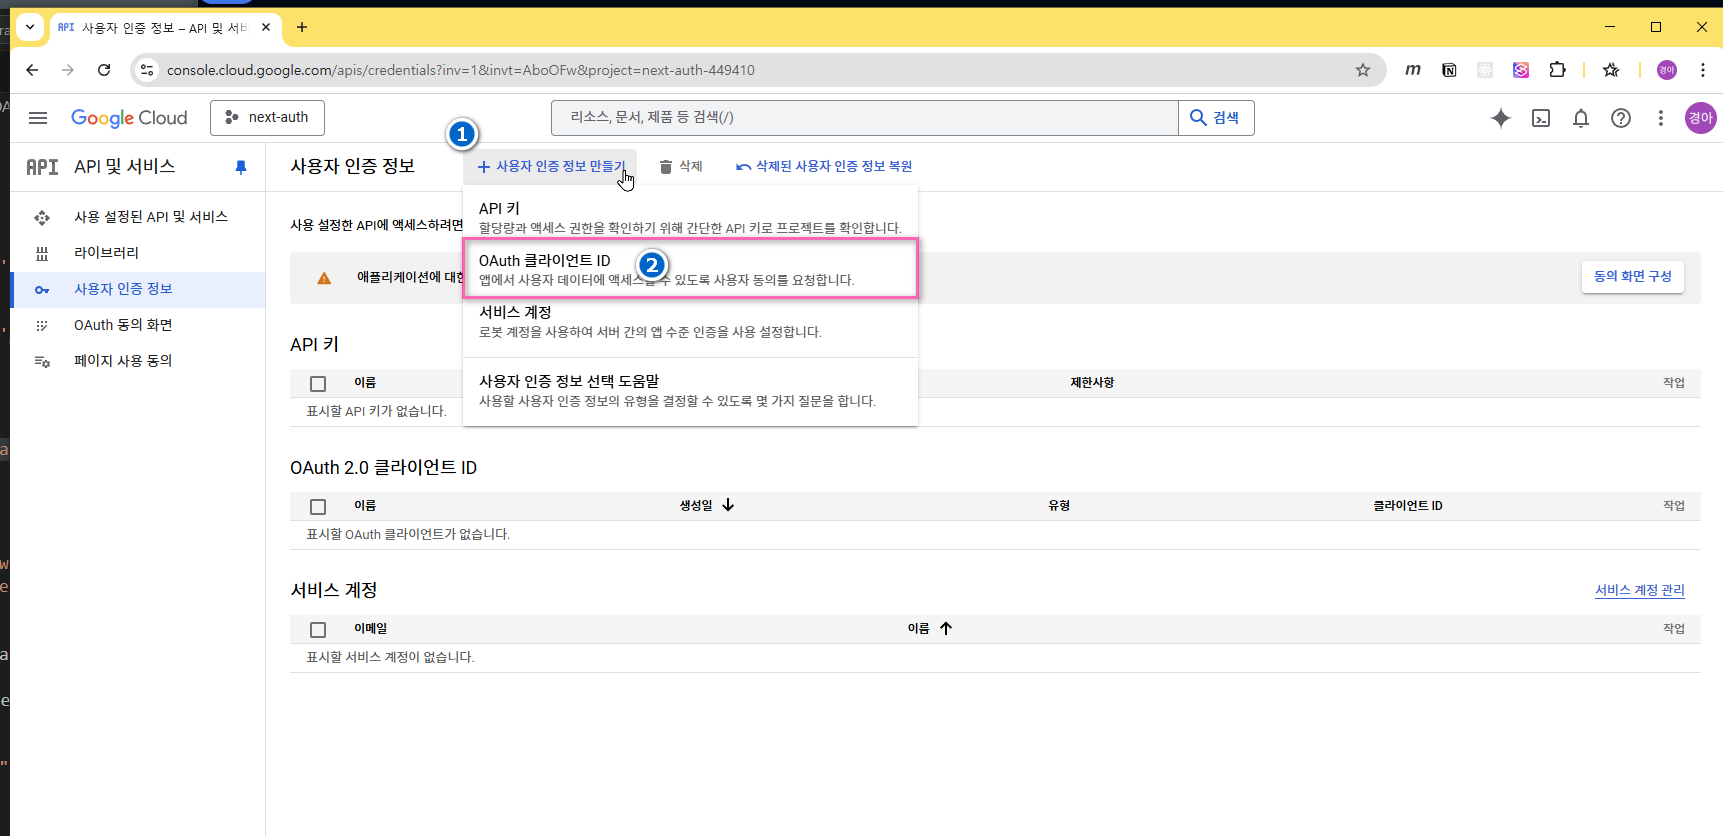
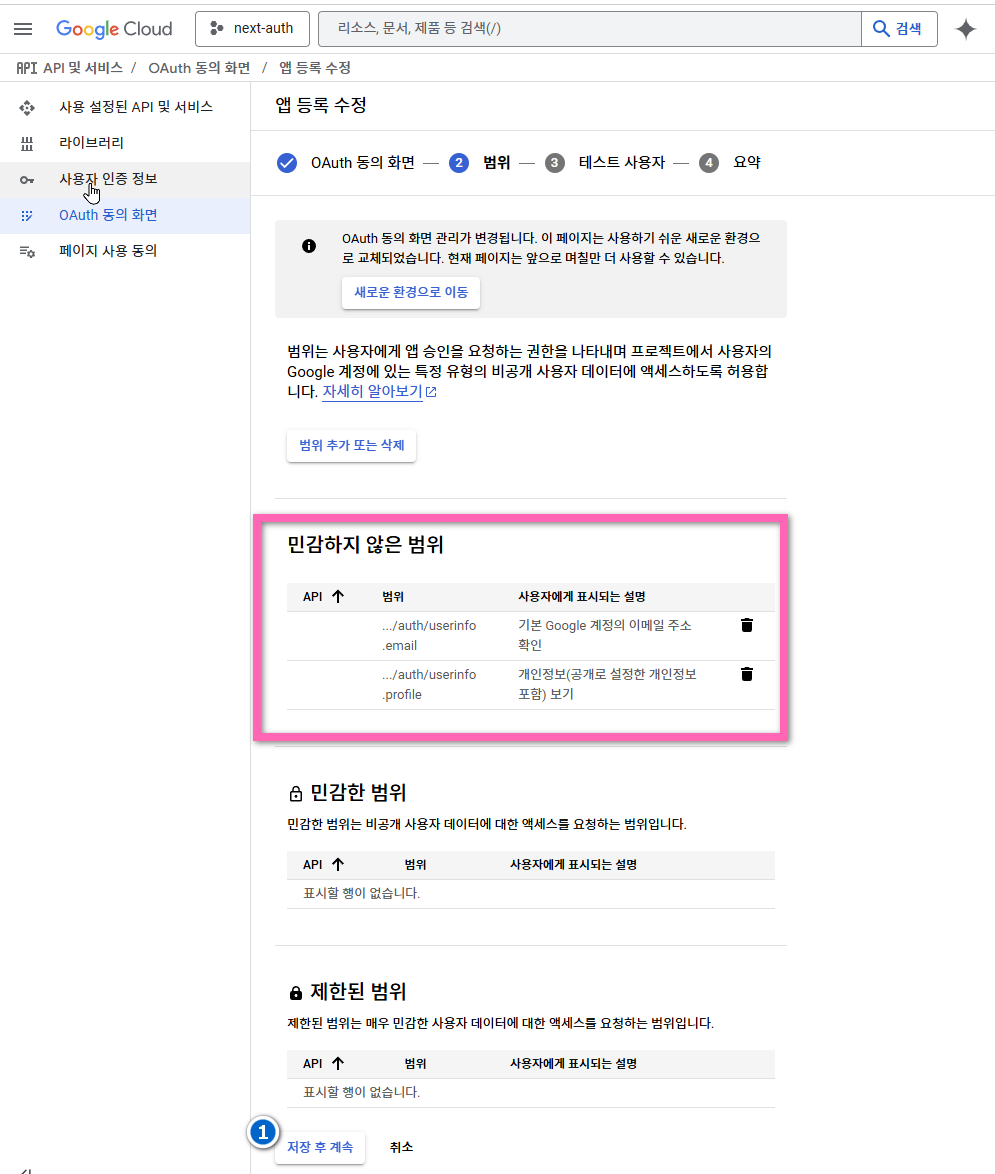
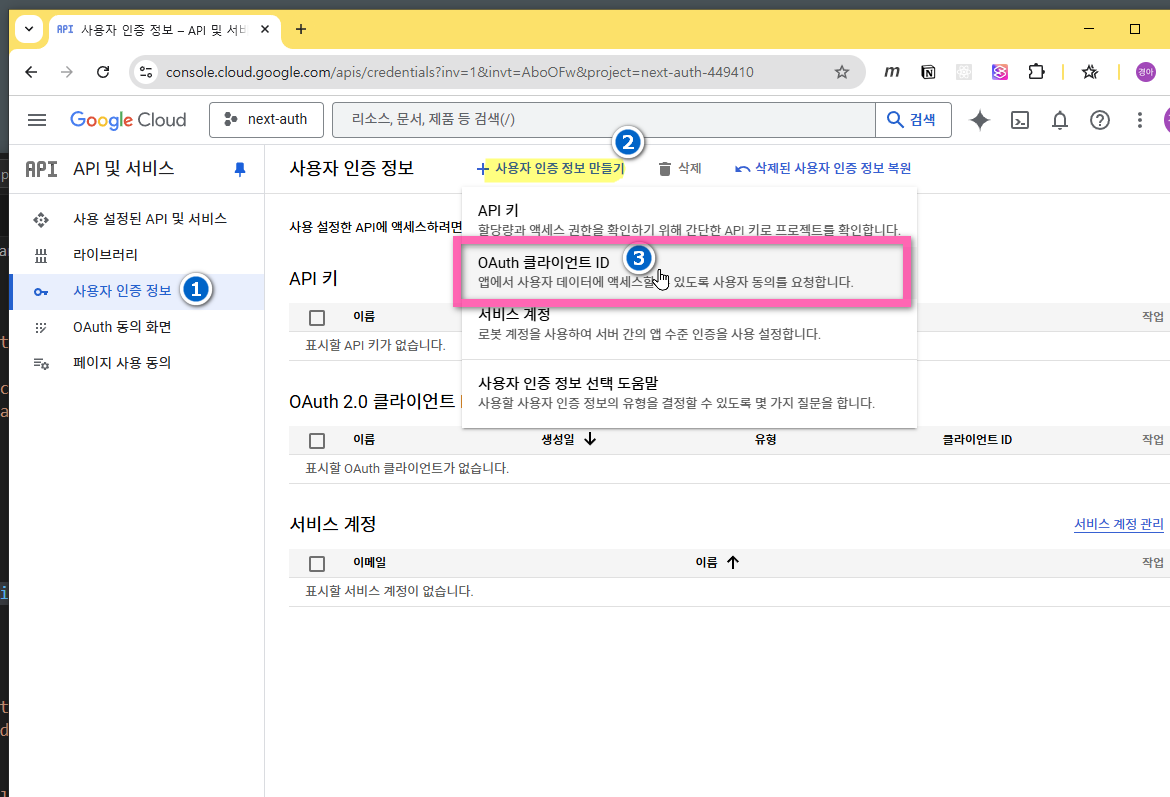
3-2-2-자격증명등록

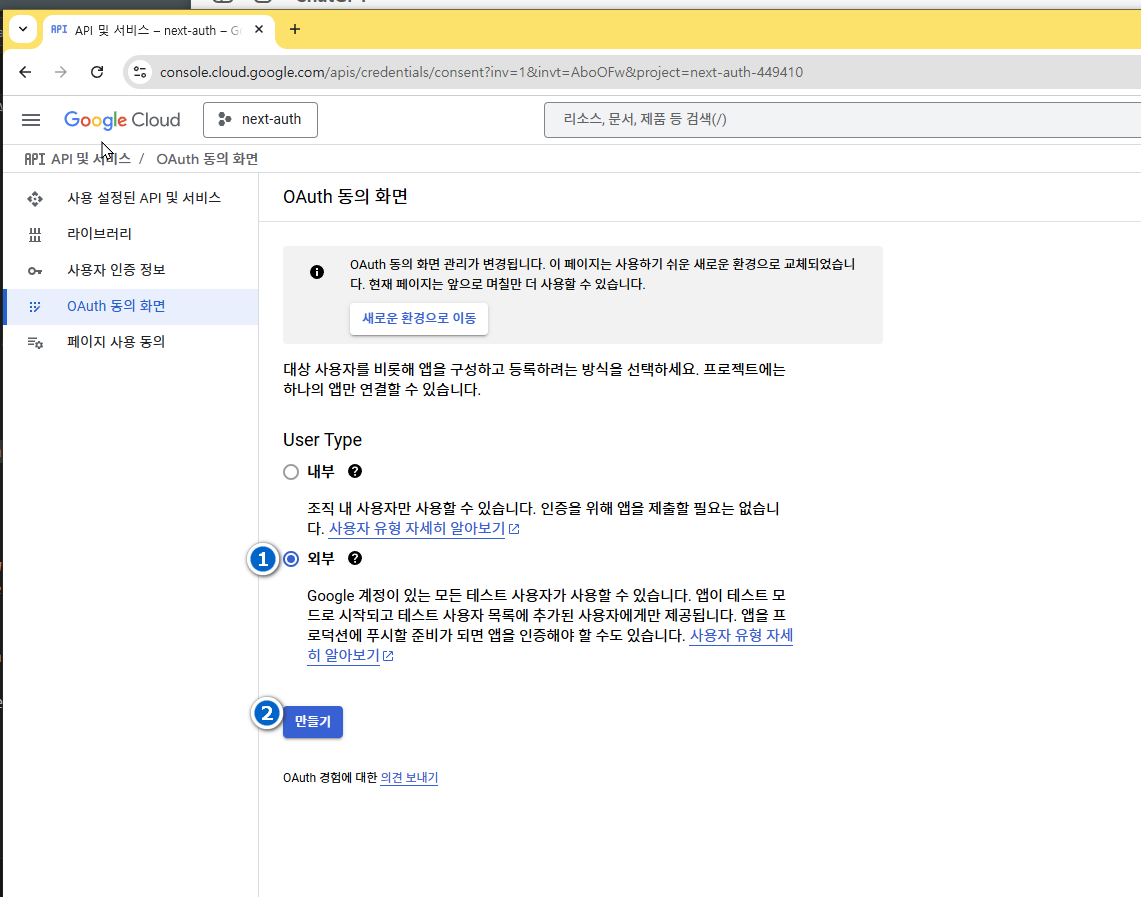
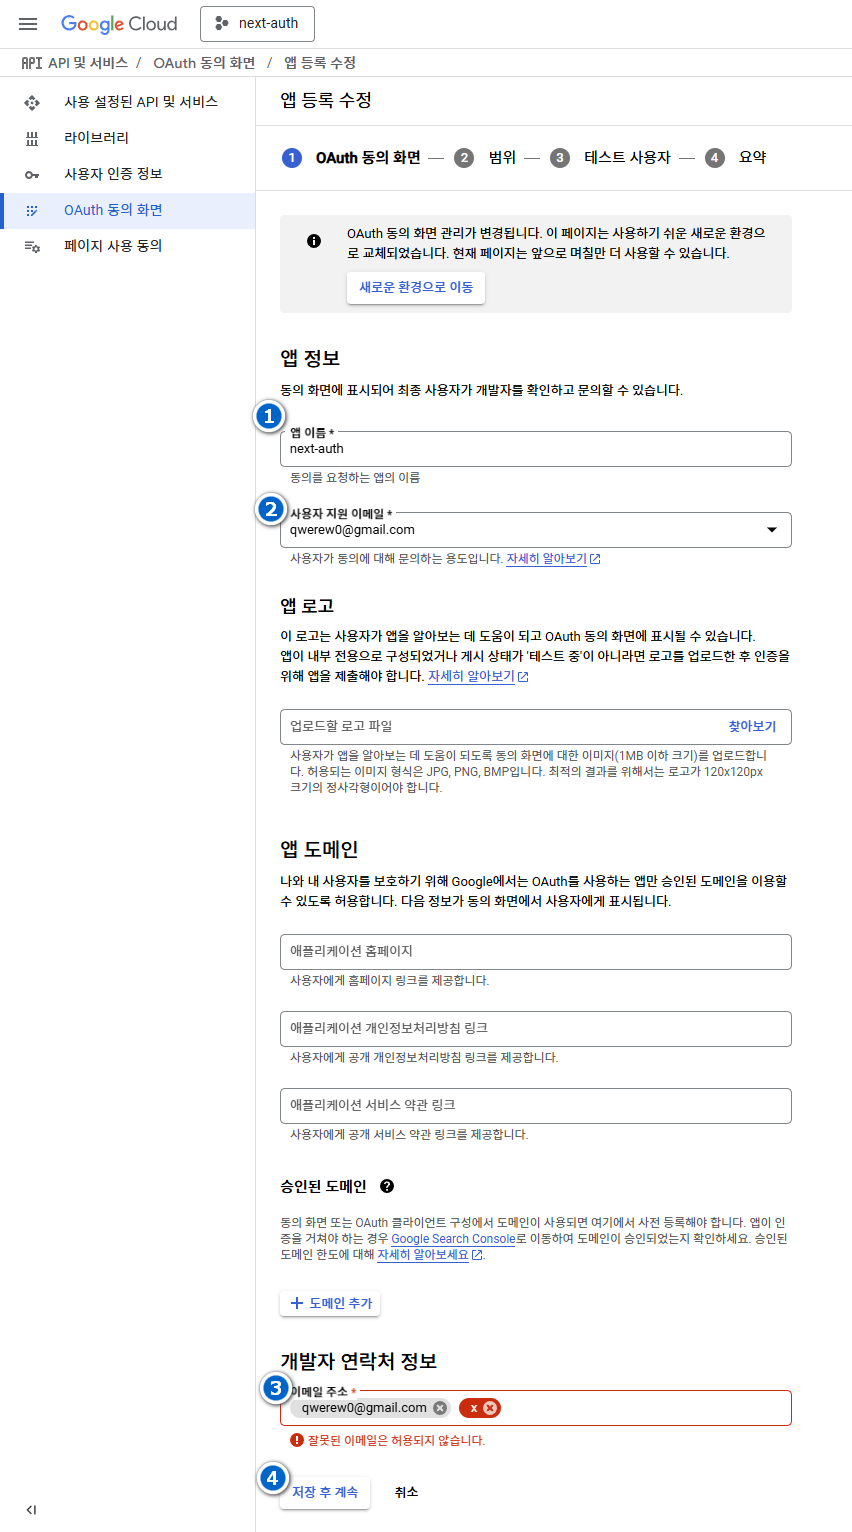
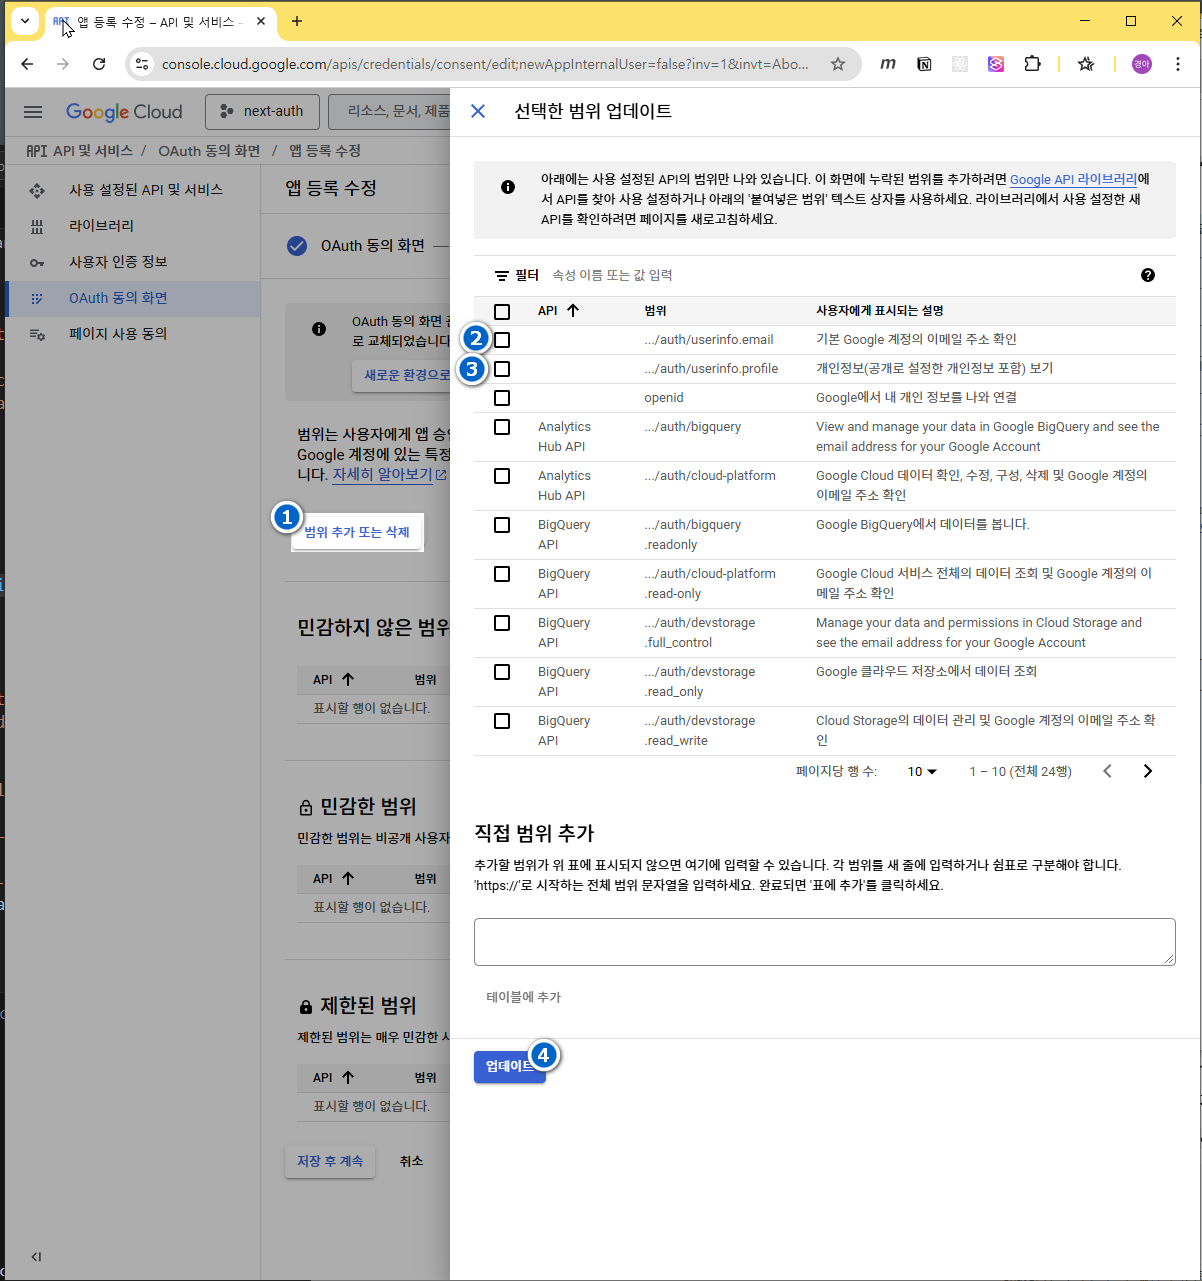
- 표시된 부분에 체크한 항목이 추가되었는지 확인후 다음진행
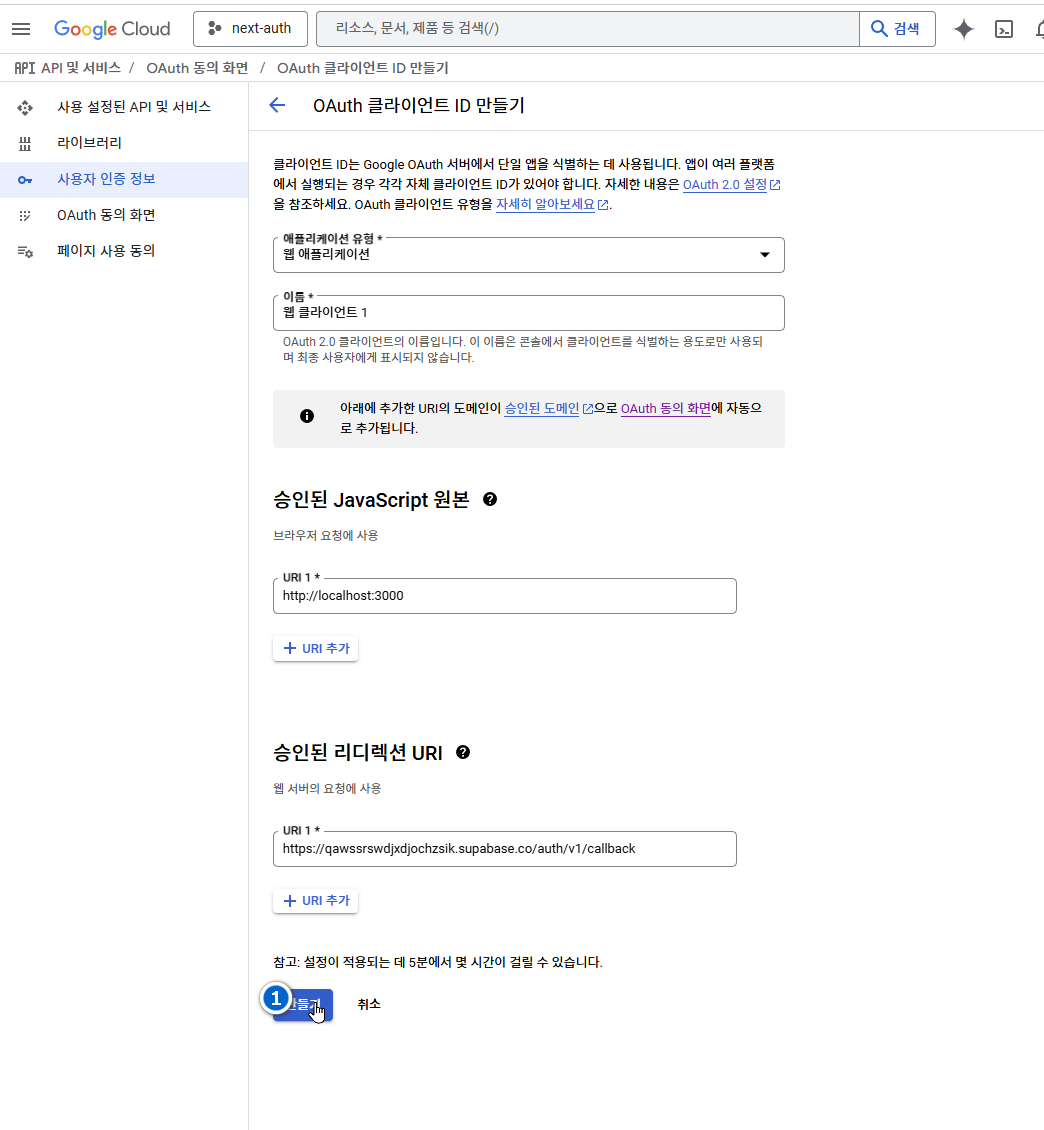
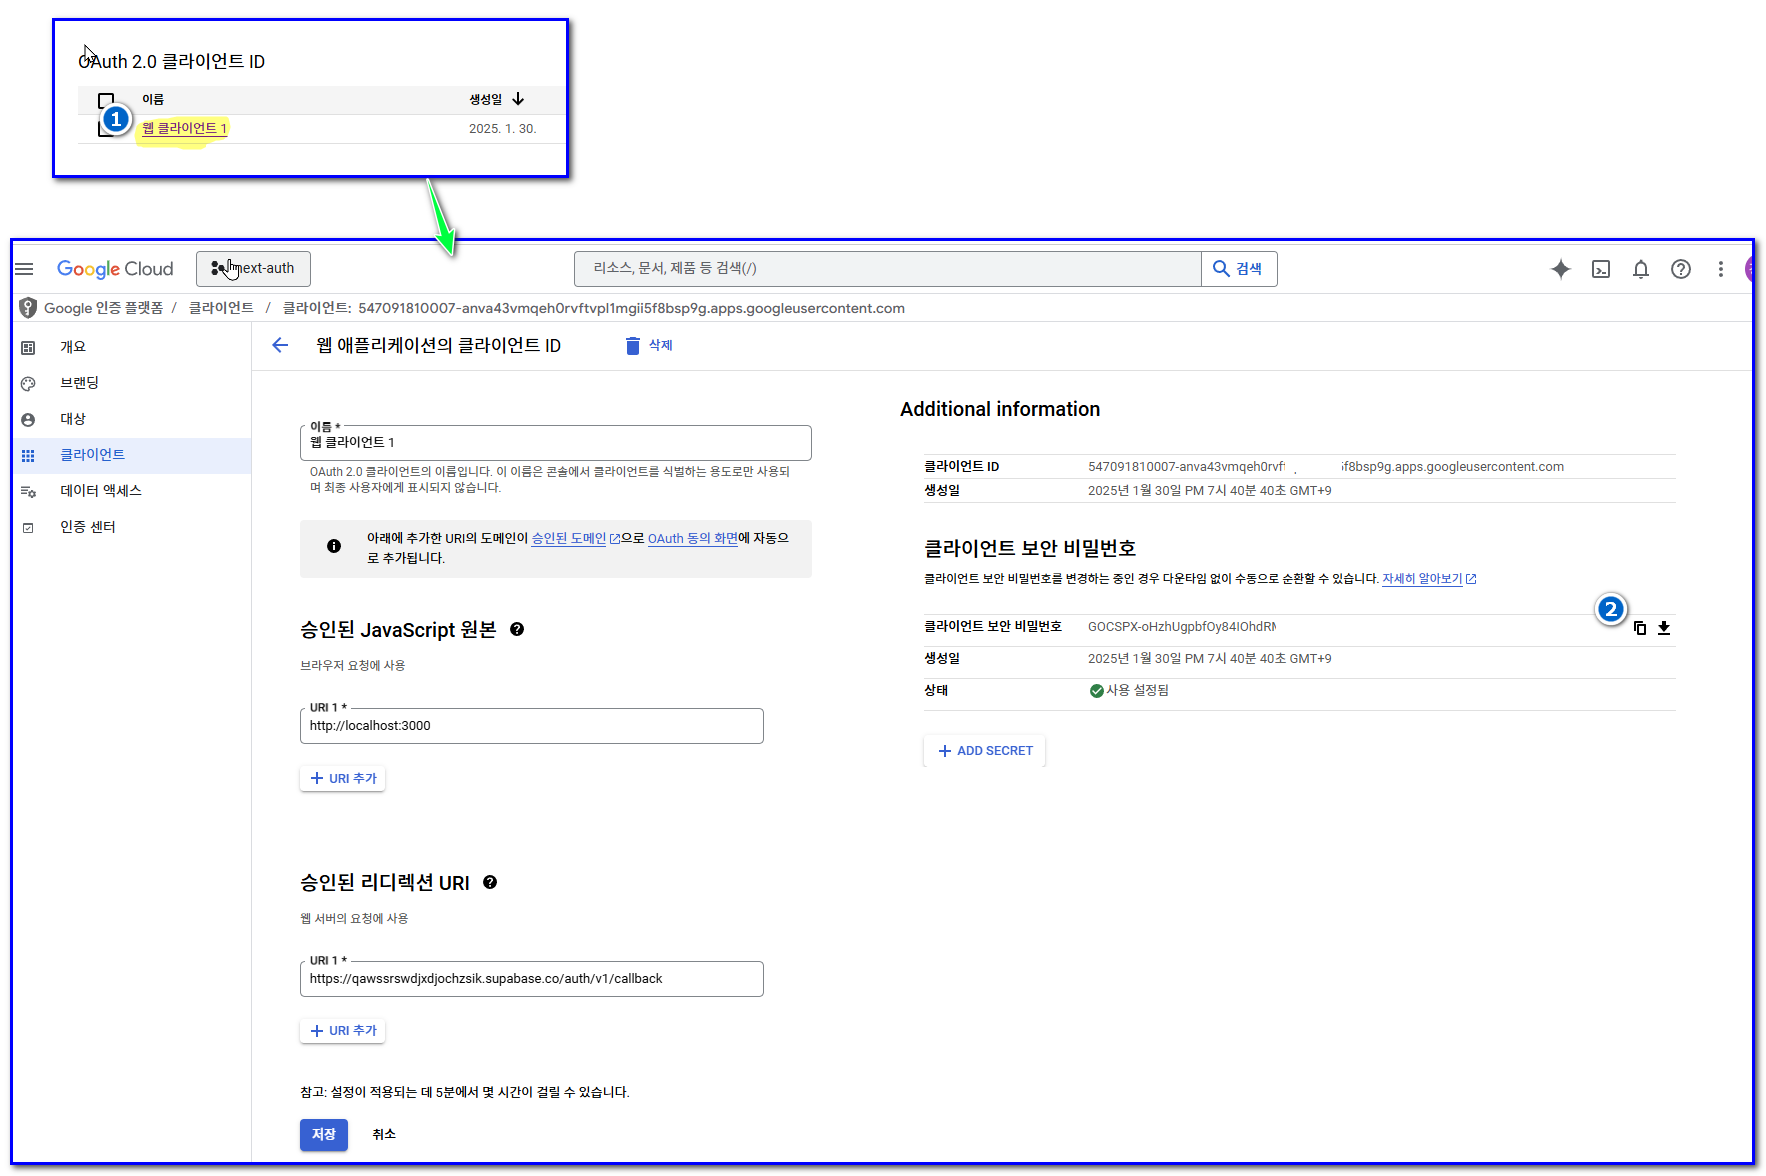
3-2-3-자격증명만들기
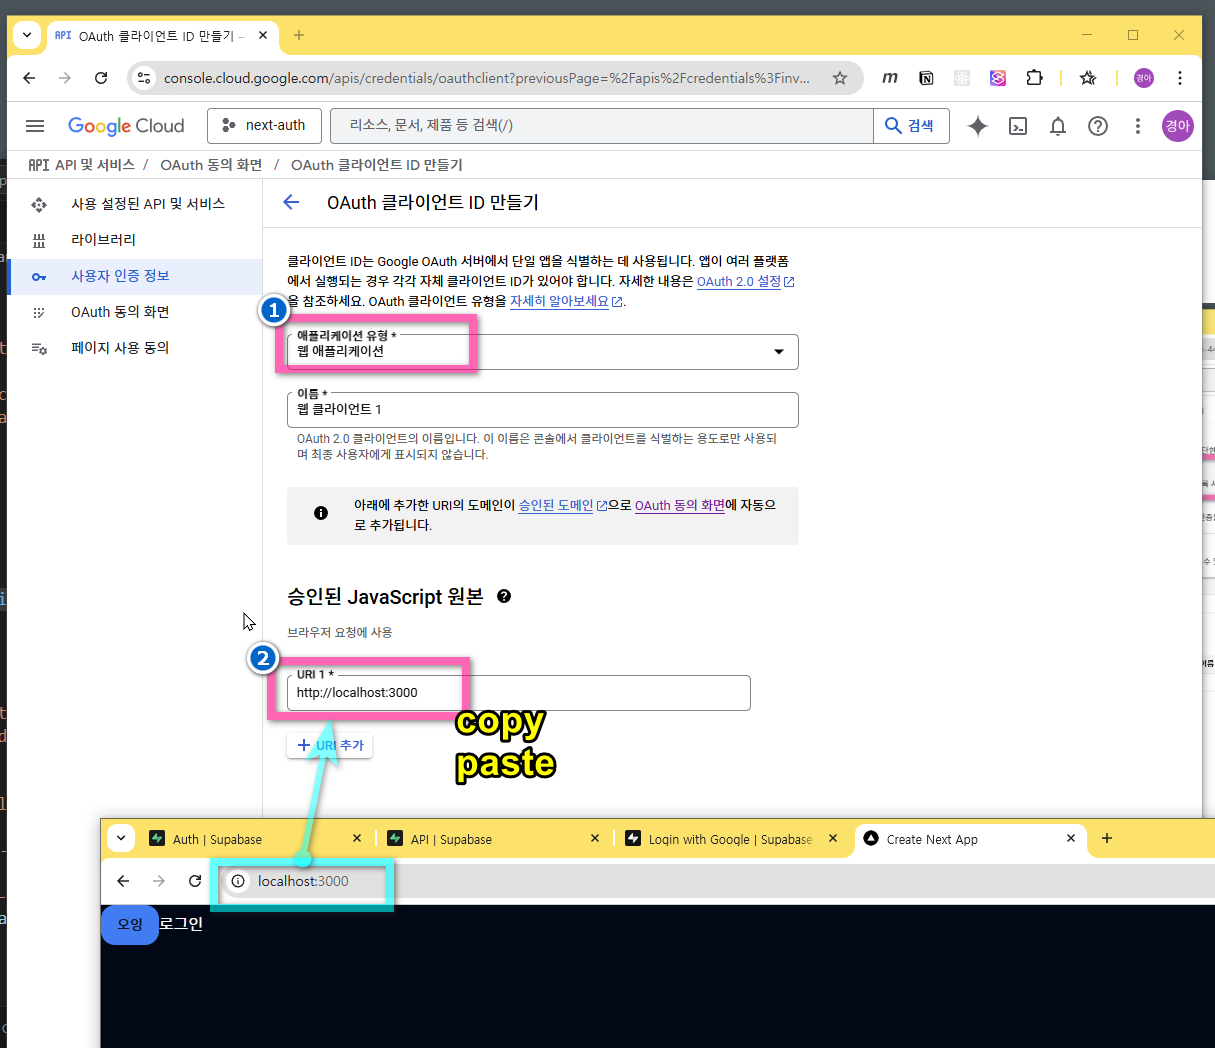
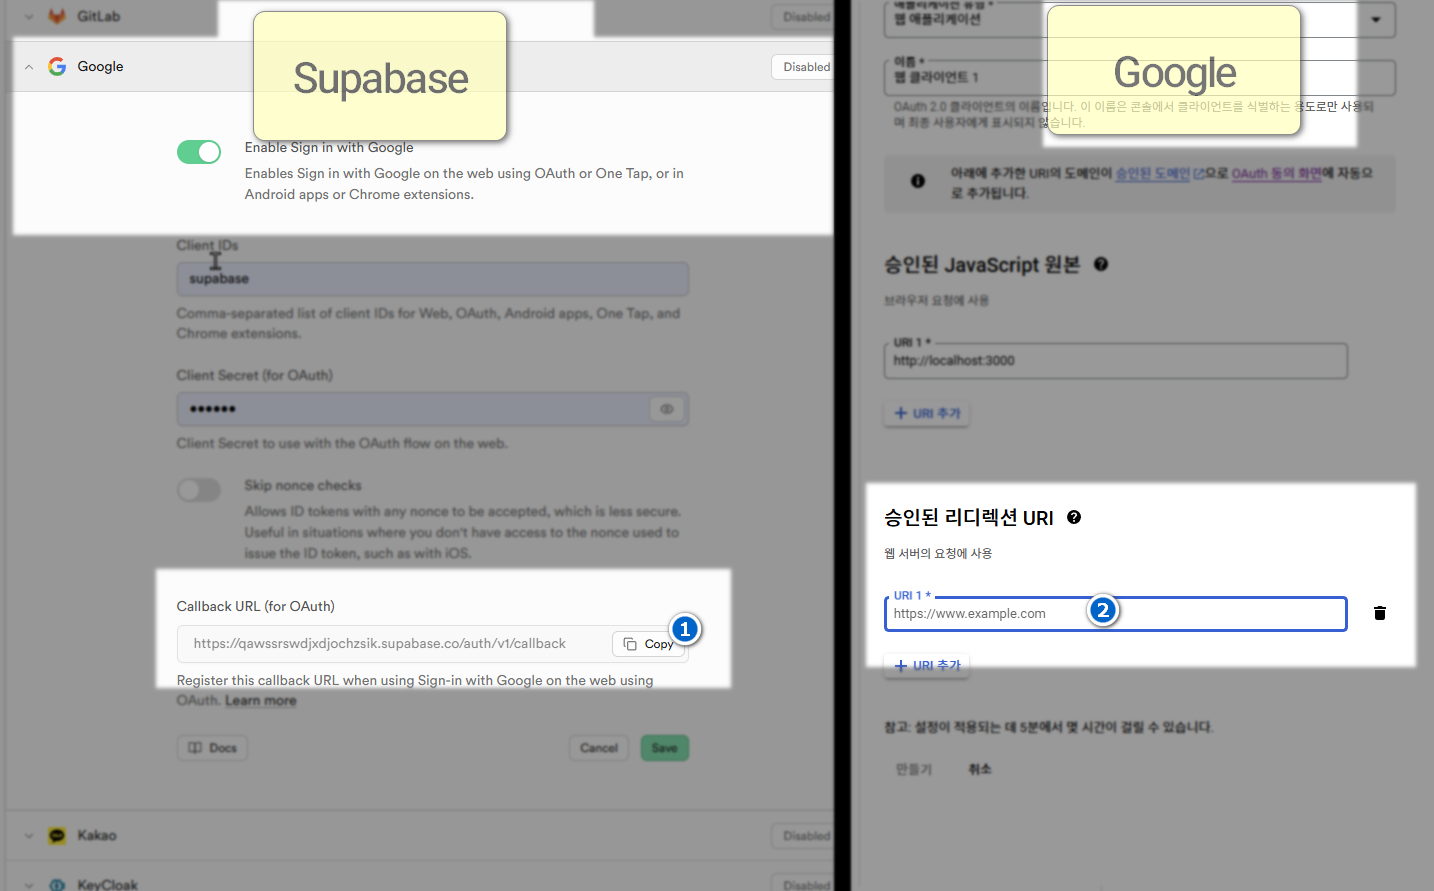
- 리디렉션 url 은 수파베이스의 Authentication 으로 이동하여 복사한다.
- Google → 만들기 클릭
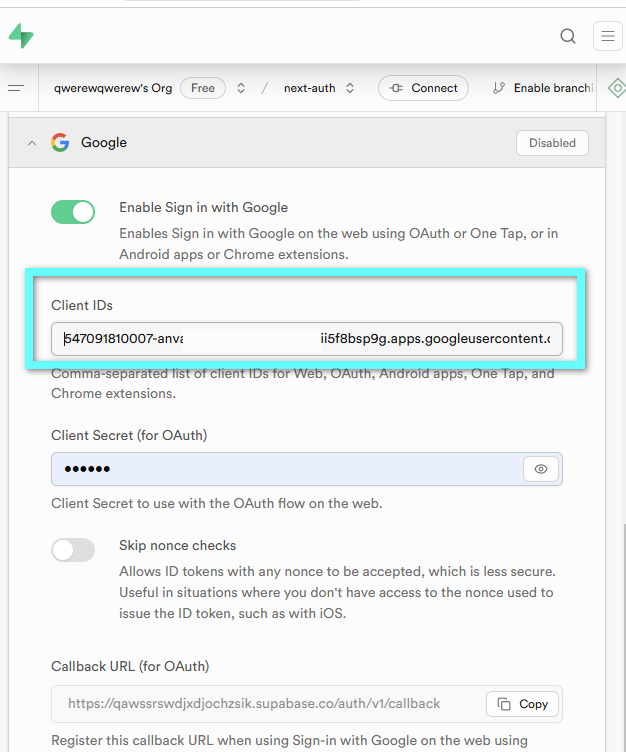
- 구글 클라이언트 아이디 복사
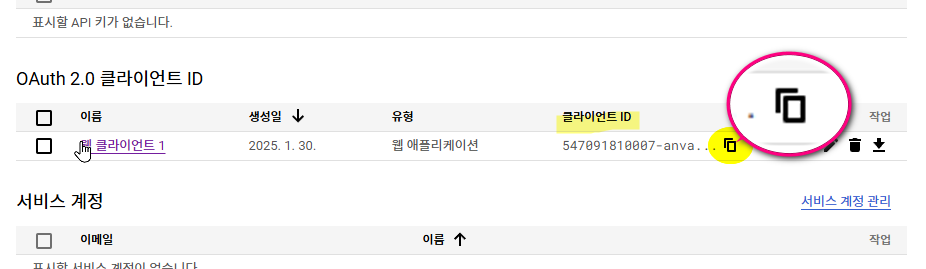
- 수파베이스에 붙여넣기
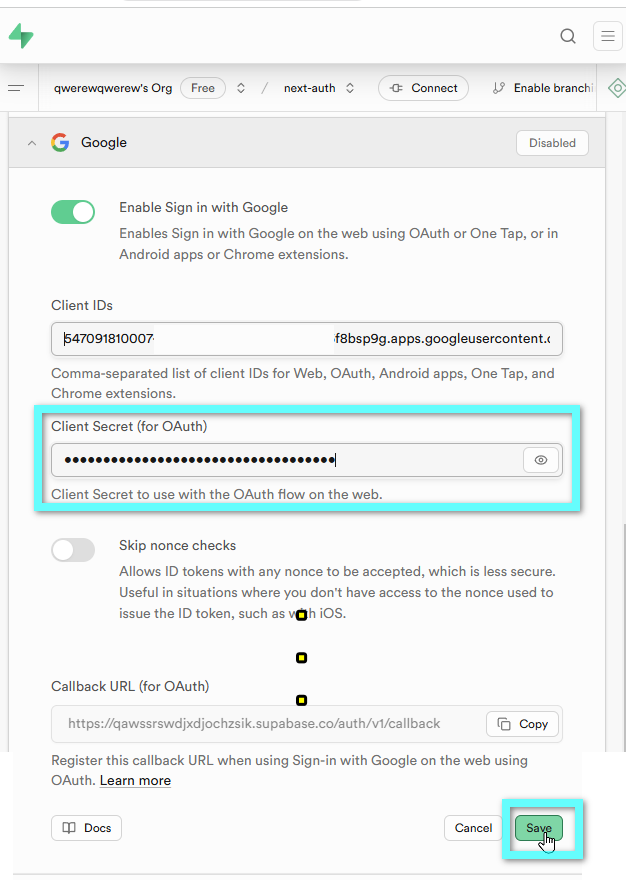
- 구글 비밀키 복사
- 수파베이스에 붙여넣기 다른 것은 비워놓고 저장 클릭
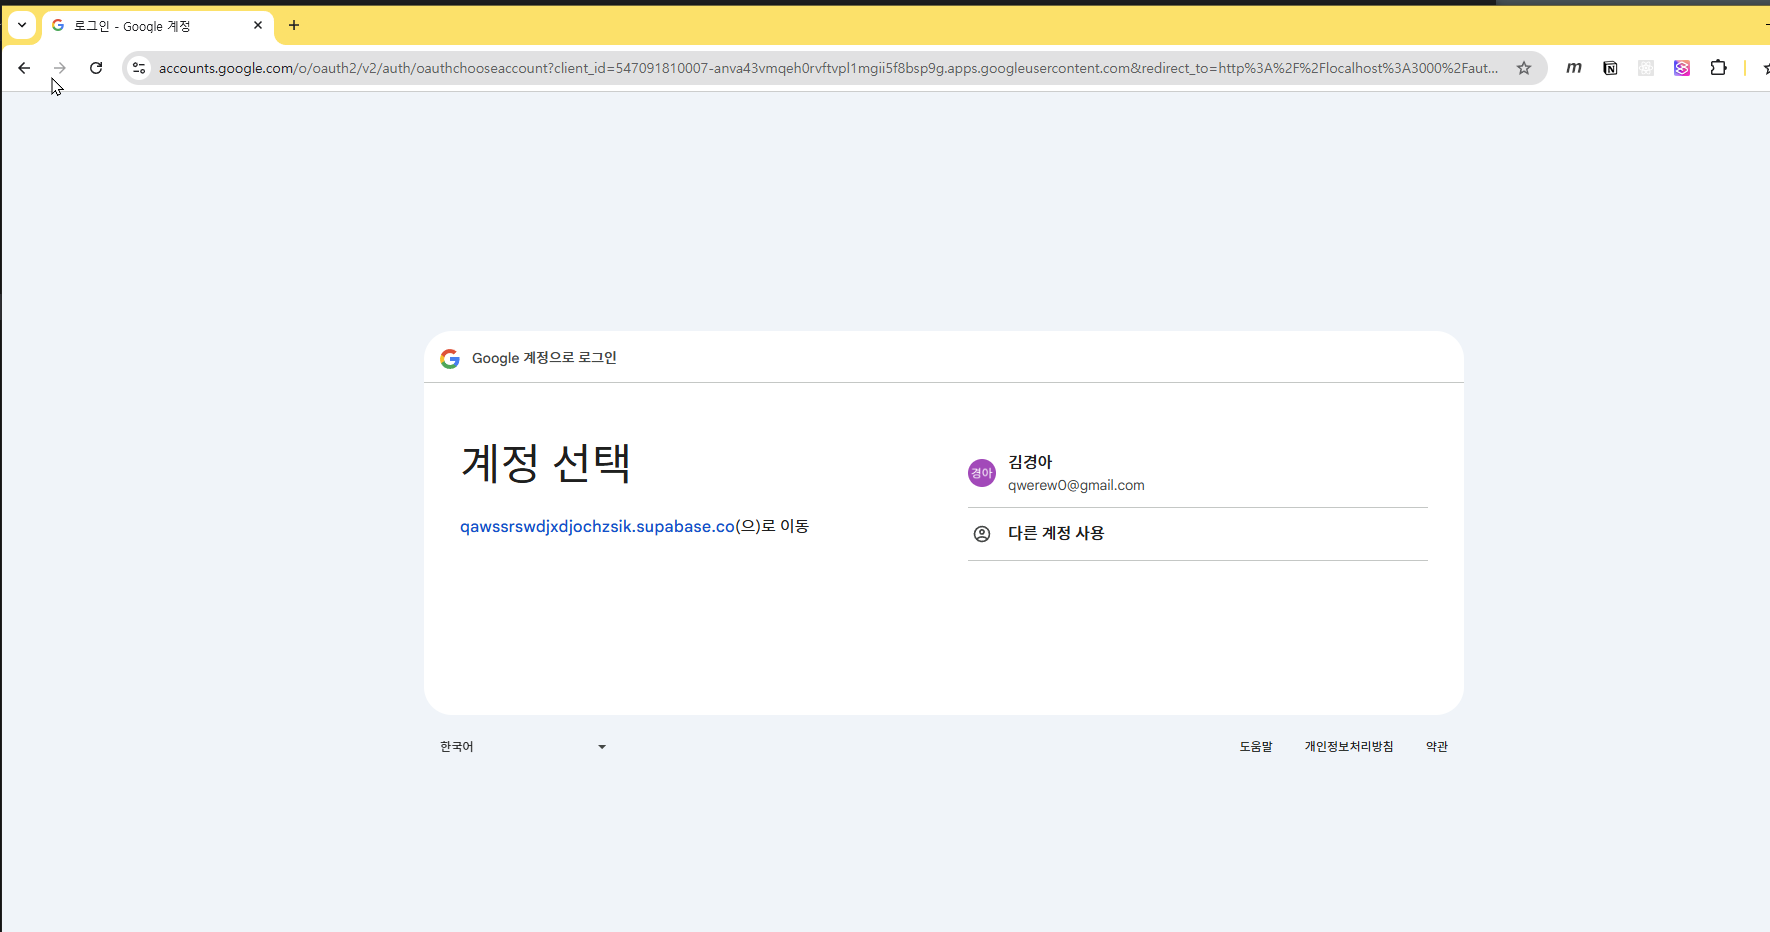
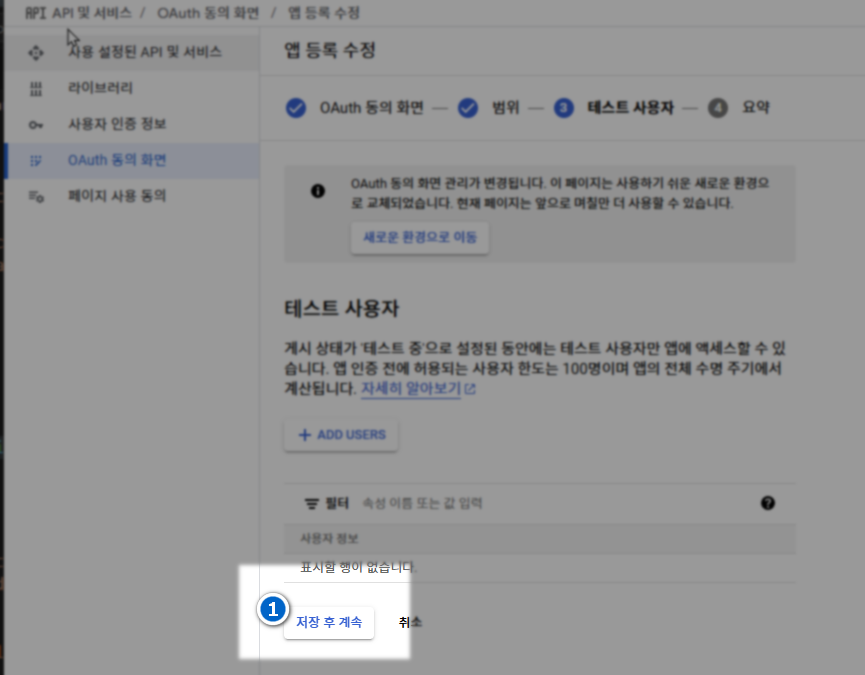
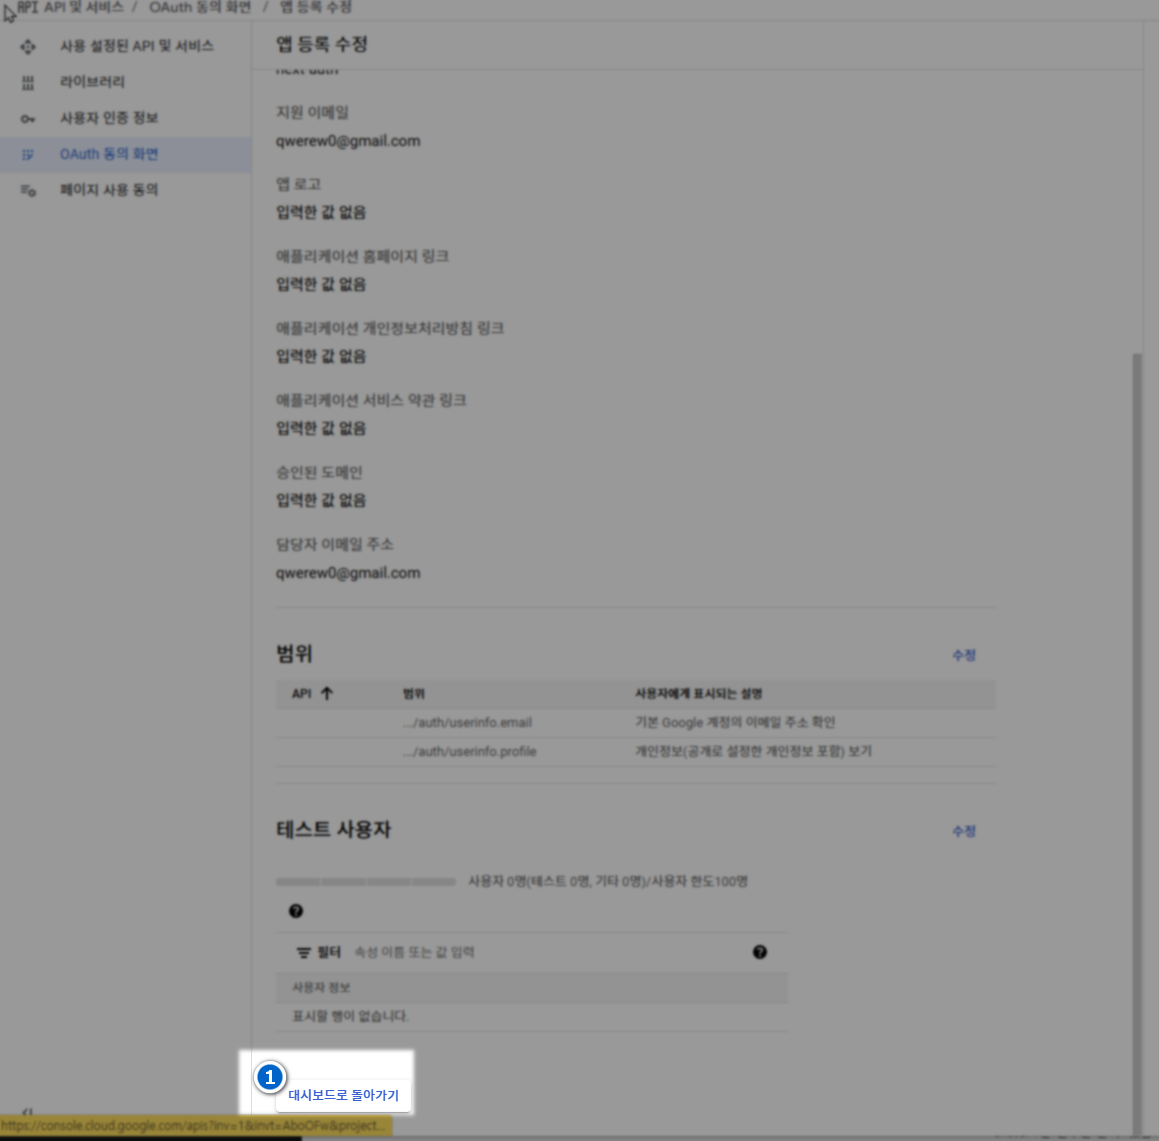
3-2-4-테스트